Add or remove items from a drop-down list in Excel 2016 for Windows
After you create a drop-down list, you might want to add more items or delete items. How you do that depends on how the list was created. When you create a drop-down list, you connect it to a list of entries, which are used to populate your drop-down list. When you hook up those entries to your drop-down list, you can point to either a name that you've given the list (called a named range), or to the cells that contain your list of entries (called a range of cells).
Edit a drop-down list that's based on a named range
-
Open the worksheet that has the named range for your drop-down list.
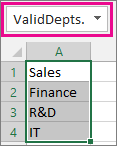
Tip: To identify a named range, select the range and look for its name in the Name Box.

-
Do any of the following:
-
To add an item, go to the end of the list and type the new item.
-
To remove an item, right-click its cell, click Delete, and then click OK to shift the cells up.
Tip: After you edit the list, sort it the way you want it to appear in the drop-down list.
-
-
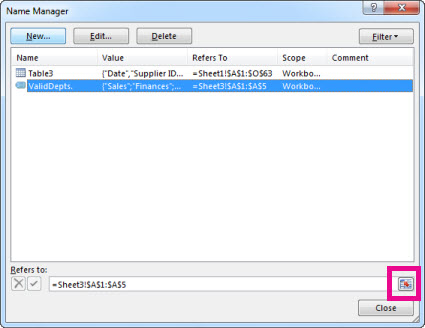
Click Formulas > Name Manager.

-
In the Name Manager box, click the named range you want to update.
-
To the right of the Refers to box, click the
 button to collapse the dialog box, and then on your worksheet select all of the cells that contain the entries for your drop-down list.
-
Click the
 button to expand the dialog box.
-
Click Close, and then in the box that appears, click Yes to save your changes.
Edit a drop-down list that's based on a range of cells
-
Open the worksheet that has the data for your drop-down list.
-
Do any of the following:
-
To add an item, go to the end of the list and type the new item.
-
To remove an item, right-click its cell, click Delete, and then click OK to shift the cells up.
Tip: After you edit the list, sort it the way you want it to appear in the drop-down list.
-
-
On the worksheet where you applied the drop-down list, select a cell that has the drop-down list.
-
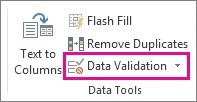
Click Data > Data Validation.

-
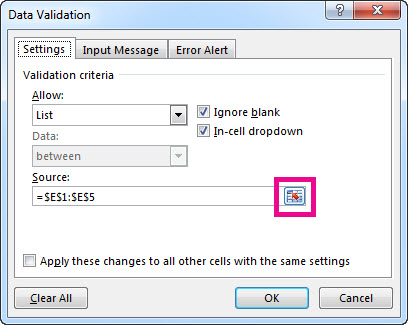
On the Settings tab, to the right of the Source box, click the
 button to collapse the dialog box, and then on the worksheet that has the entries for your drop-down list select all of the cells containing those entries.
-
Click the
 button to expand the dialog box.
-
To update all cells that have the same drop-down list applied, check the Apply these changes to all other cells with the same settings box.
Working with your drop-down list
After you update a drop-down list, make sure it works the way you want. For example, check to see if the cell is wide enough to show your updated entries.
If the list of entries for your drop-down list is on another worksheet and you want to prevent users from seeing it or making changes, consider hiding and protecting that worksheet.
Microsoft Office Tutorials: Add Or Remove Items From A Drop-Down List In Excel 2016 For Windows >>>>> Download Now
ReplyDelete>>>>> Download Full
Microsoft Office Tutorials: Add Or Remove Items From A Drop-Down List In Excel 2016 For Windows >>>>> Download LINK
>>>>> Download Now
Microsoft Office Tutorials: Add Or Remove Items From A Drop-Down List In Excel 2016 For Windows >>>>> Download Full
>>>>> Download LINK Tu