Saturday, November 20, 2021

Create a network diagram in project desktop

A Network Diagram is a graphical way to view tasks, dependencies, and the critical path of your project. Boxes (or nodes) represent tasks, and dependencies show up as lines that connect those boxes. After you've switched views, you can add a legend, customize how your boxes appear, and print your Network Diagram.

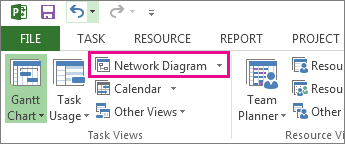
  • To find the Network diagram view, choose View > Network Diagram.

Click Network Diagram to open the network diagram view.

Add a legend

  1. Choose File > Print > Page Setup.

  2. On the Legend tab, decide how you want your legend to look, which pages it should show up on, and then labels you want.

  3. Choose OK.

Automatically change the way the boxes are laid out

  1. Choose View > Network Diagram.

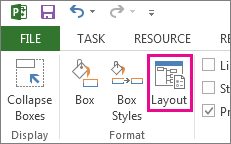
  2. Choose Format > Layout.

    The Layout button on the Format tab.

  3. Under Box Layout, choose the box arrangement, alignment, spacing, height, and width that work best for you. To space boxes evenly, select Fixed in the Height and Width boxes.

Keep in mind that grouped tasks are positioned automatically. You'll need to undo grouping if you want to change them.

Manually change the way boxes are laid out

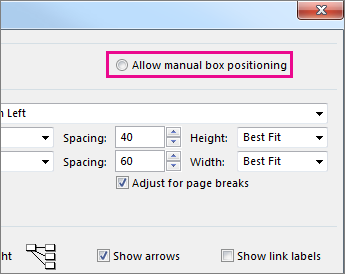
If you've gotten this far and still don't like how your boxes are positioned, click Format > Layout, select Allow manual box positioning, choose OK, and then drag the boxes to the spot you want.

Click "Allow manual box positioning" to manually reposition a task.

If you manually reposition a task, you can change the layout of any linked tasks or subtasks associated with it by right-clicking on the task and choosing Layout Related Tasks Now.

Top of Page

Change the line style between boxes

If you have a lot of tasks that you've linked to predecessor or successor tasks, the links between boxes can be really hard to follow. Try changing the line style, and then arranging them in way that's easier to see.

  1. Choose View > Network Diagram.

  2. Choose Format > Layout.

  3. Under Link style, select Rectilinear or Straight. Rectilinear links look like this A rectlinear link., and straight links look like this A straight link..

  4. Select Show arrows to add arrows that point to predecessor and successor tasks. Select Show link labels to add dependency and lead or lag time to the link line.

Top of Page

Choose what kind of task information to show

If things are looking cluttered (or you start to experience information overload), try changing the task information in each box so you only see what's most important.

  1. Choose View > Network Diagram.

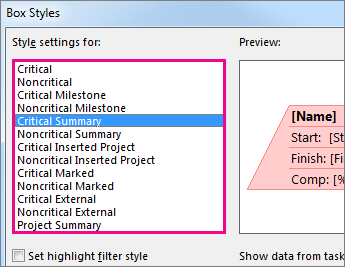
  2. Choose Format > Box Styles.

  3. In the Style settings for list, select the task that you want to change.

    Change the look and content in your task boxes.

  4. Under Border, choose the shape, color, width, and gridline options to create the look you want.

  5. Select a name under Data template to apply your changes to an existing template. To create a new template that will use your changes, choose More Templates, and then choose New (to create a new template), Copy (to base the new template on an existing one), Edit (to change a template), or Import (to import a template from another project).

  6. Choose OK.

Top of Page

Migrate email and contacts to office 365

Creating a blog with communication sites and news posts

A blog is a way to enable your organization to quickly share ideas and information. You can set up a blog site in SharePoint by using a communication site and news posts, and you can add features like categorization, filtering, and even a custom template to start from. 

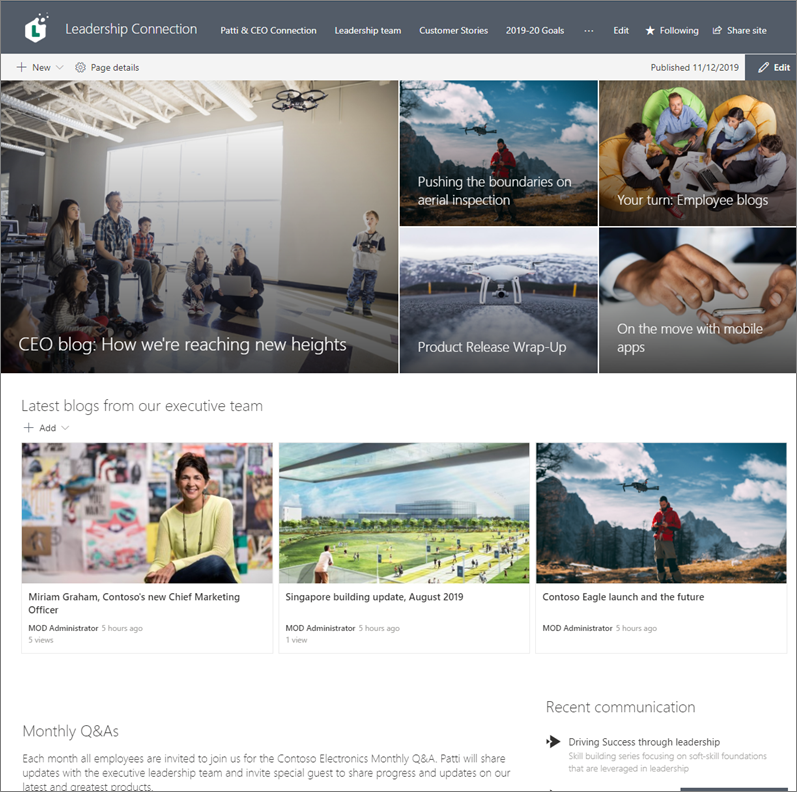
This is the way the strategy works: you use news posts as your blog pages. Then, you can display those blog pages in a news web part filtered to show only blog pages. The latest blog pages will automatically display as the top-most news stories on your site (as you can see in the "Latest blogs from our executive team" news web part below). You can also link directly to blog posts from other web parts like the hero web part.

Example of a communication site dedicated to blogs

Here are the steps for how to do this.

  1. Create the blog site. First, create a communication site that matches your desired visual styling. 

    Tip: Need ideas or inspiration? Check out the SharePoint look book. If you're a tenant admin, you can automatically create example sites from the look book directly in your tenant by using the SharePoint Online provisioning service.

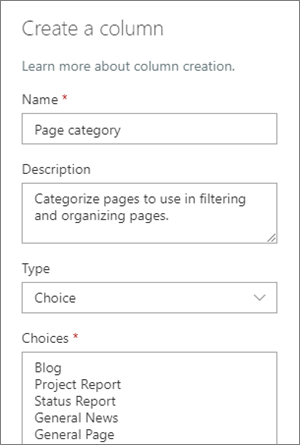
  2. Create page categories. To have only blog posts show in your news web part, create a column with category choices in the pages library for the site that includes a blogs category. In this example we use "Page category" as the column name.

    Example of setting up a category choice column for blogs

    Now that you've created a choice column in your pages library, it will be available as a property you can set for your news post page. So, you can designate certain news posts as blog posts.

    Tip: If you want to reuse this column in other places across your site, create a site column instead, and then add that column to your library.

  3. Filter the web part. With your page in Edit mode, select the News web part edit pencil Web part edit button, and then under Filter, select Page properties.
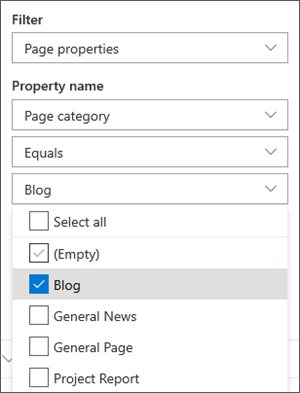
    Under Property name, select Page category or the name you gave to the column.

    Select Equals, then select Blog.

    Filter set to Blogs in News web part pane

    Tip: You can create additional columns for other ways to filter, such as a Yes/No column to indicate whether certain posts should be featured. 

  4. Use a news web part. Be sure your communication site home page uses a News web part where you want your blog posts to appear. 

  5. Write a blog post.

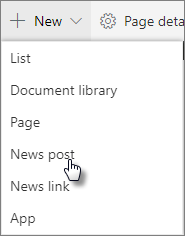
    1. From your site home page, select New and then News post.

      News post menu item
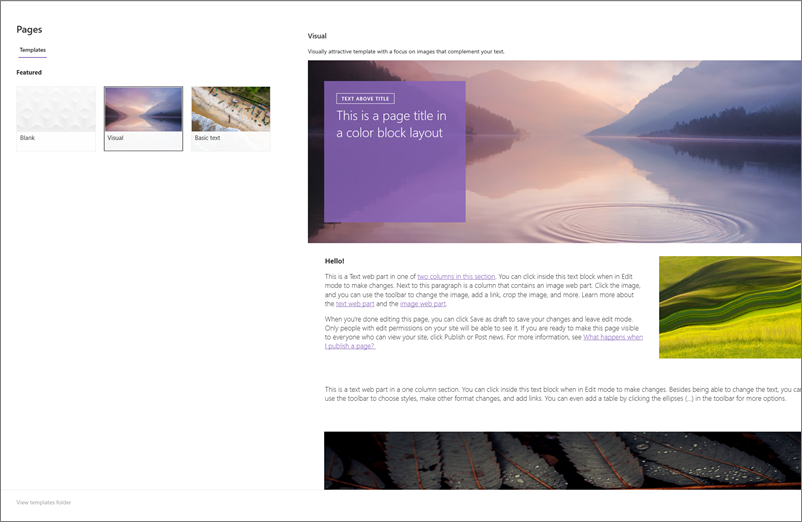
    2. Select a template to use.

      Template gallery

      Tip: Create a custom template that is already tagged with the Blog page category so you don't have to tag every new blog post. See the steps in the section Tip: Create a blog template below to do this.

    3. Add your content using the Text web part and other web parts for images, videos, and more.

  6. Tag the page with the "Blog" category you created in step 3.

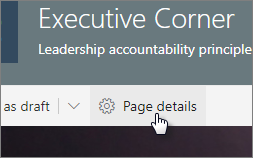
    1. At the top of your page, select Page details.

      Page Details menu
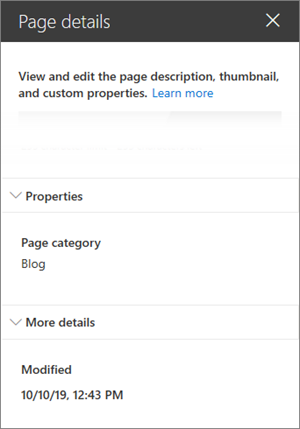
    2. In the pane on the right, under Properties, select Blog for the Page category property.

  7. Page details pane with Page category of blog

Tip: Create a blog template

To make creating and tagging your blog posts easier and faster, create a blog page template.

  1. Create a news post that has the layout, images, or other web parts that you want to reuse in future blogs.

  2. Tag the page with the "Blog" category following Step 6 above.

  3. Be sure to add a title for the template, and then select the dropdown next to Save as draft at the top left, and select Save as template.

The next time you create a blog post, you can choose this template from the Page template pane.

Tip: If you are a SharePoint admin and you want to convert several blogs using the SharePoint Transformation tool, and you're familiar with using PowerShell, see Modernize classic blogs.

Handling html markup in sharepoint calculated fields

In Microsoft SharePoint lists and libraries, calculated fields that are running in the classic UI mode can be used to display results that are based on formulas that resemble those in Microsoft Excel. This is a long-standing capability that is documented in Calculate data in lists or libraries.

Some users have added HTML markup or script elements to calculated fields. This is an undocumented use of the feature, and we will block the execution of custom markup in calculated fields in SharePoint Online from June 13, 2017 onwards. The June 2017 Public Update (PU) and later PUs will make blocking a configurable option for on-premises use in SharePoint Server 2016 and SharePoint Server 2013.

More information

SharePoint Online 

We are changing calculated fields to block the execution of custom markup. This mean that calculated fields that contain any unsupported markup will not display correctly.

This change went into effect on June 13, 2017. Administrators can request an extension through September 10, 2017 at the latest. During this extension, execution of custom markup in calculated fields will not be blocked. This request can be submitted through Microsoft Support. However, beginning September 10, 2017, all unsupported markup will be ignored.

SharePoint Server 2013 and SharePoint Server 2016

The June 2017 PU and subsequent PUs will include a new web application setting that's called CustomMarkupInCalculatedFieldDisabled. This setting lets an on-premises administrator determine whether execution of custom markup in calculated fields in a given web application is blocked.

The following is the default behavior for existing and new web applications at the time of the update installation.

Web app type

Default setting

Newly created web app after the update is installed

Block execution of custom markup in calculated fields

Existing web app after the update is installed

Allow execution of custom markup in calculated fields

The following are some useful links to JSLink and CustomAction documentation:

Ignore resource calendar task field

Data Type     Yes/No

Entry Type     Entered

Description     The Ignore Resource Calendar field indicates whether the scheduling of the task takes into account the calendars of the resources assigned to the task. By default, this field contains No, indicating that resource calendars are considered in the scheduling of this task. This field can be modified when you apply a task calendar to the task. You can then select Yes, indicating that only the task calendar is considered in the scheduling of this task.

Best Uses     Add the Ignore Resource Calendar field to any task view when you want to view or change whether tasks ignore the resource calendar in favor of the task calendar. You might want to ignore resource calendars if you want the assigned resource to work during what would normally be nonworking time just for this specific task.

Example     You have a "Set up trade show booth" task to which you have assigned two resources. The normal working times for the resources are 8:00 A.M. to 5:00 P.M., but they need to set up the booth from 4:00 A.M. until 9:00 P.M. You create and assign a task calendar for the task. Then you add the Ignore Resource Calendar field to the Task Sheet view and set the field to Yes for this task.

Remarks     The Ignore Resource Calendar field can also be set in the Task Information dialog box.

Differences between using a notebook in the browser and in onenote

Microsoft OneNote for the web lets you take notes and organize note pages in a web browser. For more advanced editing features, use OneNote for the web 's Open in OneNote command. When you save the notebook in OneNote, it is saved on the website where you opened it in OneNote for the web.

The notebook you open in OneNote for the web is the same as the notebook you open in the OneNote desktop app, but some features work differently in the two environments.

In this article

File formats supported in OneNote for the web

OneNote for the web opens OneNote 2010 and later notebooks (.one files).

OneNote for the web can't open notebooks in other file formats. For example, these formats are not supported: OneNote 2003 or OneNote 2007 notebooks (.one), OneNote Package (.onepkg), and Portable Document Format (PDF).

Top of Page

Features supported for viewing and printing

When you view notes in OneNote for the web, you can page through a notebook, expand and collapse sections, see who has contributed which notes, and see previous versions of a page.

However, some features work differently in the browser than they do in the OneNote desktop app. To use features that are not available in OneNote for the web, click Open in OneNote (requiresOneNote 2010 or later).

This feature

Works like this in OneNote for the web

Print

Print is not available in OneNote for the web. Instead, use your browser's print feature. Use Print Preview to see if you need to scroll to a part of the notebook, or switch page orientation from Portrait to Landscape.

Audio and video

OneNote for the web does not play audio and video content, but the media is preserved in the notebook, and you can download audio and video files to your computer to play them.

Search

Search is limited to the current section in OneNote for the web.

Zoom

Zoom is not available in OneNote for the web. Instead, use your browser's zoom feature.

Shapes, equations, ink

In OneDrive, OneNote for the web displays shapes and ink, but equations are displayed as placeholders. In SharePoint, ink is viewable, equations are displayed as placeholders, and shapes are hidden.

Rule lines and page color

OneNote for the web cannot display these, but they are preserved in the notebook.

Line breaks

Line breaks are displayed as placeholders.

Top of Page

Features that differ between the browser and the desktop

When you edit notes, some features work differently in the browser than they do in the OneNote desktop app. The following tables describe how OneNote for the web supports features that might apply to your notes. To use features beyond what's available in OneNote for the web, click Open in OneNote (requiresOneNote 2010 or later).

Opening notebooks

This feature

Works like this in OneNote Online

Information Rights Management (IRM)

In SharePoint libraries that are IRM-protected, OneNote for the web opens notebooks for reading, but not for editing. IRM protection can't be added to notebooks in OneNote for the web.

Editing and formatting

This feature

Works like this in OneNote for the web

Copy and Paste

Copy and paste text, and copy/paste pictures from the web. Text pasted within a notebook keeps its original formatting, but text pasted from outside OneNote for the web loses formatting such as bold and italics.

Font formatting

Apply bold, italics, underline, font, size, and color. Note: the Format Painter command is not available in OneNote for the web.

Text formatting

Align text left, right, or centered; run text right-to-left or left-to-right; increase or decrease indentation; format text as a bulleted or numbered list.

Numbering and bullets

Apply built-in numbering or bullet formats.

Styles

Apply one of a gallery of built-in styles. You can also clear formatting.

Search

Search is limited to the current section in OneNote for the web.

Insert Space

The command for creating empty space on the page is not available in OneNote for the web. Try moving notes around to make room, or start a new page.

Rule lines and page color

Commands for changing the look of the page are not available in OneNote for the web. Rule lines and page color are hidden in OneNote for the web, but they are preserved in the notebook.

Co-authoring

Multiple authors can work simultaneously in OneNote 2010, OneNote for the web, and OneNote Mobile. Show and hide author names.

Follow-up on notes

This feature

Works like this in OneNote for the web

Tags

Tag notes for follow-up, and remove tags when you want. Tags cannot be customized in OneNote for the web, and your custom tags are not available to apply. However, OneNote for the web displays custom tags, and you can remove them.

Find Tags

This feature is not available in OneNote for the web.

Outlook integration

OneNote for the web does not support commands that work with Microsoft Outlook (E-mail Page, Outlook Tasks, or Meeting Details).

Reviewing

This feature

Works like this in OneNote for the web

Proofing tools

Check spelling and set the proofing language, using the built-in dictionary. OneNote for the web does not use a custom dictionary and does not include translation or a thesaurus.

Page versions

View and restore previous versions of a page.

Review notes by unread, recent, and author

Notes cannot be marked as read or unread in OneNote for the web, and reviewing edits by how recent they are or by author is not available.

Objects

This feature

Works like this in OneNote for the web

Hyperlinks

Insert, edit, and follow hyperlinks to the web or to other pages in the same notebook. Links to locations within the notebook work at the page, but not the paragraph, level in OneNote for the web.

Tables

Tables are created the same way in OneNote for the web as they are in the OneNote desktop app.

Pictures, clip art, and screen clippings

Insert pictures stored on your computer, or insert clip art available on Office.com. You can change the size of pictures, and add Alt-text. More sophisticated features for working with pictures, such as rotating or ordering in layers back-to-front, are not available in OneNote for the web. You can't take screen clippings in OneNote for the web, but screen clippings in your notes display as pictures in OneNote for the web.

Audio and video

These are preserved in the notes, but cannot be recorded in OneNote for the web. You can download audio and video files to your computer to play them.

Shapes, equations, and ink

These can't be inserted or edited in OneNote for the web. In OneDrive, you can select and delete shapes, ink, and equation placeholders. In SharePoint, you can select and delete placeholders for these objects.

Symbols

These can't be inserted or edited in OneNote for the web, but OneNote for the web displays them as expected.

Embedded files

Download these to your computer to open them.

Timestamp

The commands for inserting the current date and time are not available in OneNote for the web, but OneNote for the web displays them as expected.

Linked notes

The ability to link note-taking to files is not available in OneNote for the web, and links to files are hidden. However, they are preserved in the notes.

Resolve duplicate records

Play your emails on the go

Play your emails on the go

Organize and answer email with short voice responses or simple swipes. Play My Emails in the Outlook app helps you stay on top of what matters.

Play my emails