Distribute a page to all students in your class
-
Open the Class Notebook you'd like to distribute from in OneNote.
-
Select the page(s) you want to distribute in your notebook's Content Library or Collaboration Space.
-
Select the Class Notebook tab, then select Distribute Page.
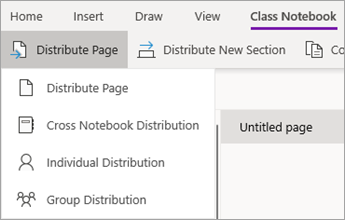
-
Choose the notebook section you'd like the page(s) copied to. For example: Handouts. All students will get a copy of the page in their notebook's Handouts section.
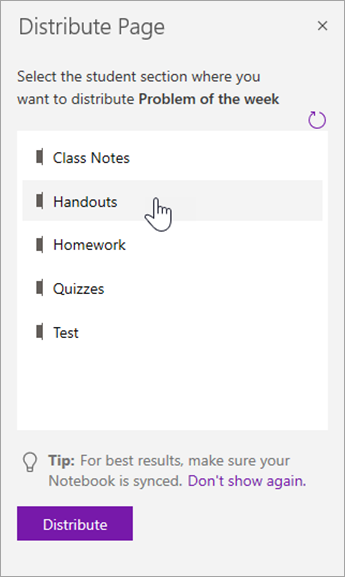
Notes:
-
Select View distributed pages to view status updates on pages you've distributed to students. You can close the distribution window at any time and pages will continue distributing in the background.
-
To delete a page you've distributed, follow these steps.

Distribute pages to individual students
-
Open your Class Notebook and navigate to the page you'd like to distribute.
-
Select the Class Notebook tab, then Distribute Page > Individual Distribution.

-
Select the students you'd like to distribute the page to using the checkboxes next to their names. Select Next.
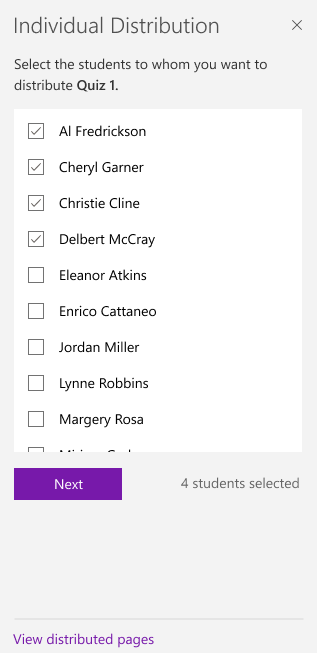
-
Select the section of the student's notebook where you want the page to show up. For example: Quizzes.
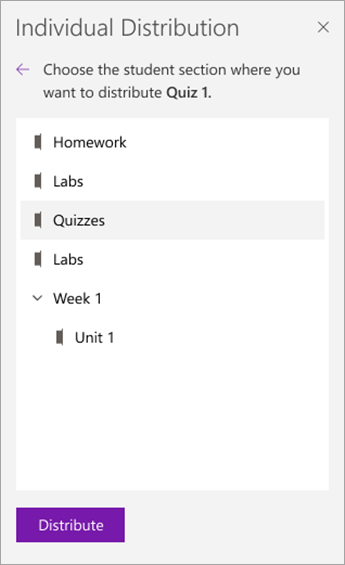
-
Select Distribute.
Note: Select View distributed pages to view status updates on pages you've distributed to students. You can close the distribution window at any time and pages will continue distributing in the background.
Distribute pages to groups of students
Create and save groups of students, allowing you to deliver different content based on learner needs or small group projects.
-
Open your Class Notebook and navigate to the page you'd like to distribute.
-
Select the Class Notebook tab, then Distribute Page > Group Distribution.

-
If you haven't created any student groups yet, select + New group in the Group Distribution pane.
-
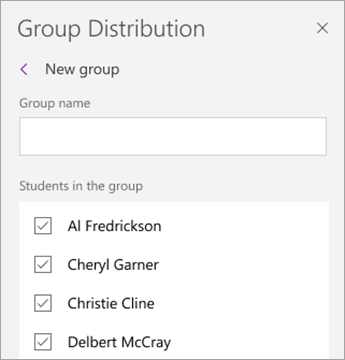
Enter a name for your group and choose students using the checkboxes next to their names.
-
Select Save.
-
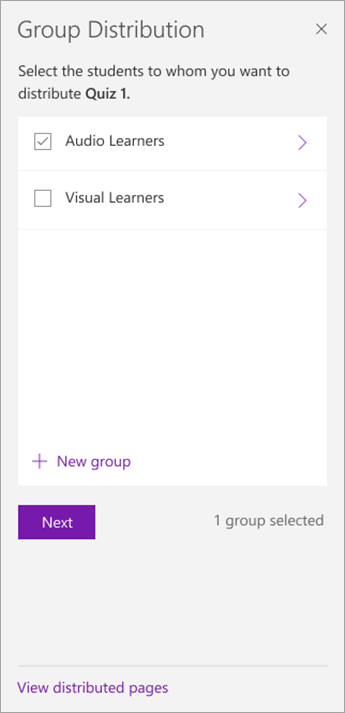
Now that your new group is created, select the Go back arrow. Select the checkbox next to your group, then Next.
-
Select the section of the students' notebooks where you want the page to show up. For example: Quizzes.

-
Select Distribute.
Notes:
-
Select View distributed pages to view status updates on pages you've distributed to students. You can close the distribution window at any time and pages will continue distributing in the background.
-

To create additional student groups, repeat steps 2-5 above. To edit a group's name or members, select Distribute Page > Group Distribution. Select the arrow next to your group's name, then Edit group. Save your changes or select Delete to delete the group.
Distribute a section
-
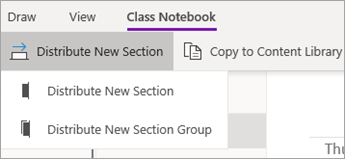
Select Distribute New Section > Distribute New Section in the Class Notebook ribbon.
-
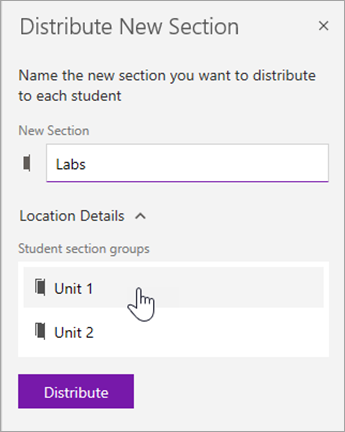
Name your new section. For example: Labs.
-
If you've added section groups to student notebooks, you can choose one as a destination for the new section now. Select the dropdown next to Location Details and choose a section group.
-
Select Distribute. A new section will be created and distributed to each student in your Class Notebook.
Distribute a section group
Section groups are a good way to organize units or topics with a lot of content. Create a new section group and organize into sections at the same time, then distribute to students.
-
Select Distribute New Section > Distribute New Section Group in the Class Notebook ribbon.

-
Name your new section group and any sections you want within it. Select + Section to add more sections.
![Type names for the section group and sections.]](https://support.content.office.net/en-us/media/f332ee0b-f3db-477d-ac0e-7ba7a531831f.png)
-
Select Distribute. The blank section group and any sections in it will be created and pushed out to each student in your Class Notebook.
Distribute pages from one notebook to another
Distribute a page from any OneNote notebook to your students in Class Notebooks. You can distribute the same page to multiple notebooks at the same time.
-
Open any notebook and navigate to the page you'd like to distribute.
-
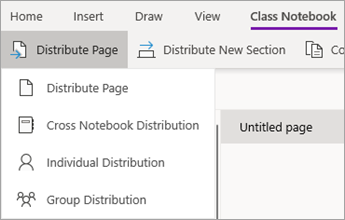
Select the Class Notebook tab, then Distribute Page > Cross Notebook Distribution.
-
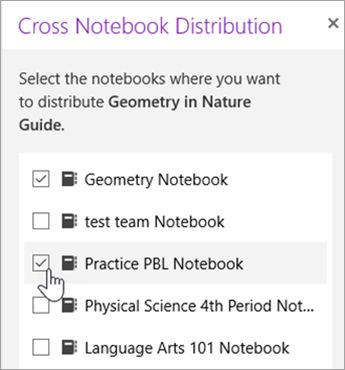
Choose the notebooks you want to distribute this page to, then select Next.
-
Choose a student section to distribute the page(s) to, then Distribute.
Note: Select View distributed pages to view status updates on pages you've distributed to students. You can close the distribution window at any time and pages will continue distributing in the background.
To quickly distribute pages or content right into student sections of your Class Notebook, right-click on any page, image, or highlighted text and select Distribute Content.
Note: OneNote 2016 works best with the latest updates installed.
Distribute a page to all students in your class
-
Open the Class Notebook you'd like to distribute from in OneNote.
-
Select the page(s) you want to distribute in your notebook's Content Library or Collaboration Space. To select multiple pages at once, hold down the Shift key as you select them.
-
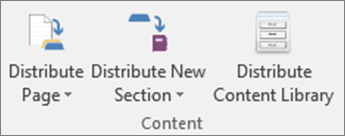
Select the Class Notebook tab, then select Distribute Page.
-
Choose the notebook section you'd like the page(s) copied to. For example: Handouts. All students will get a copy of the page in their notebook's Handouts section.
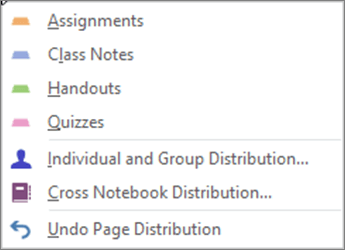
Tip: To undo your most recent page distribution, select Distribute Page, then Undo Page Distribution. This will delete the page from all student notebooks unless they have begun editing it.
Distribute pages to individual students or student groups
-
Open the Class Notebook you'd like to distribute to in OneNote.
-
Select the page(s) you want to distribute to your notebook's Content Library or Collaboration Space. To select multiple pages at once, hold down the Shift key as you select them.
-
Select the Class Notebook tab, then select Distribute Page.

-
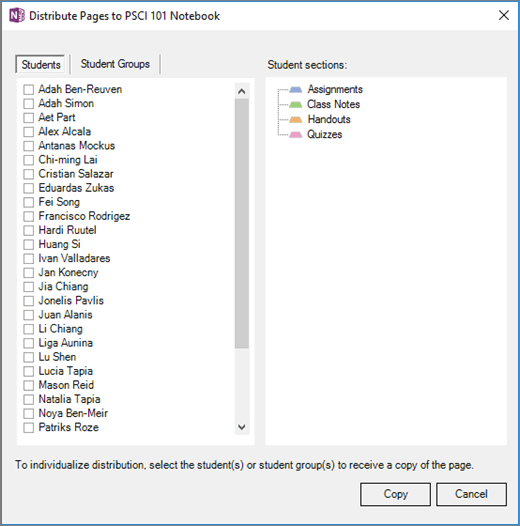
Select Individual and Group Distribution.

-
Select individual students by selecting their names.
-
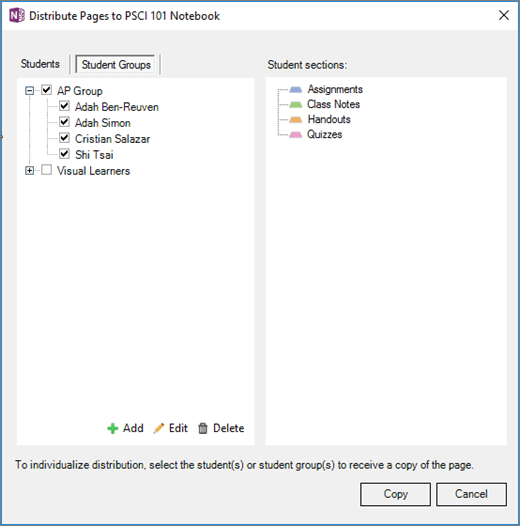
Use the Student Groups tab to add, edit, or delete groups.
-
Choose the notebook section you'd like the page(s) copied to. For example: Handouts. All students will get a copy of the page in their notebook's Handouts section. Select Copy.
Note: To undo your most recent page distribution, select Distribute Page, then Undo Page Distribution. This will delete the page from all student notebooks unless they have begun editing it.
Create a new section or section group for all students in your class
-
Select Distribute New Section in the Class Notebook ribbon, then either Distribute New Section or Distribute New Section Group.
-
Name your new section or section group. For example: Labs. You can select a specific section group for your new section by expanding More options.
-
Select Create.
Distribute pages to multiple Class Notebooks
Share pages to all students in multiple classes at the same time. For example, if you teach two Algebra classes, you can distribute a handout to both classes at once.
-
Open the Class Notebook that has the pages or sections you want to distribute.
-
Select the page(s) you want to distribute. To select multiple pages at once, hold down the Shift key as you select them.
-
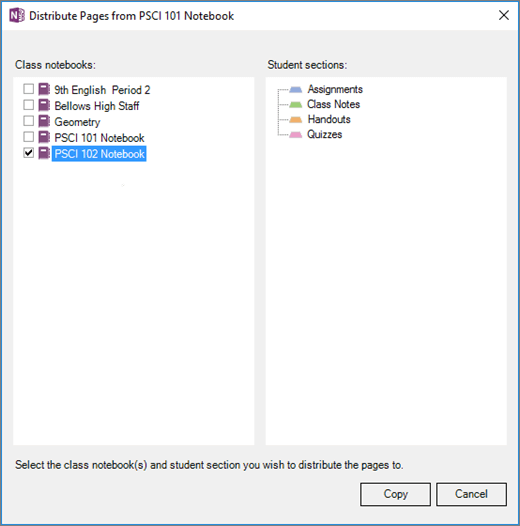
Select Distribute Page in the Class Notebook ribbon, then Cross Notebook Distribution.


-
Use the checkboxes to select the notebooks and notebook sections you'd like to distribute the page(s) to. For example: Handouts.
-
Select Copy.
You can also Rename/Manage/Add Student Sections from Manage Notebooks.(http://www.onenote.com/classnotebook/notebook-links)
Learn more
Delete pages you've distributed to students
No comments:
Post a Comment