Format or customize a table of contents
After you have created a table of contents in Word, you can customize the way it appears. For example, you can change the layout, change the text formatting, select how many heading levels to show, and choose whether to show dotted lines between the entries and the page numbers.
For basic instructions on customizing a table of contents, see Change the layout of your table of contents below.
Here are some other ways you can edit your table of contents.
Format the text:
Change the level of an entry:
Add dot leaders:
Change the number of levels shown:
Change the layout of your table of contents
-
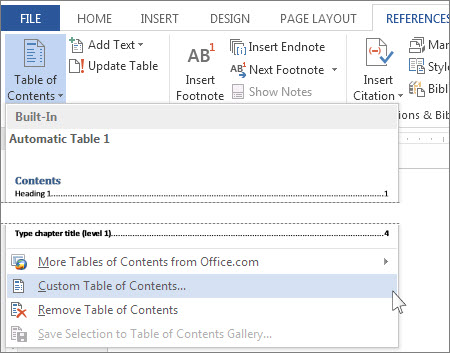
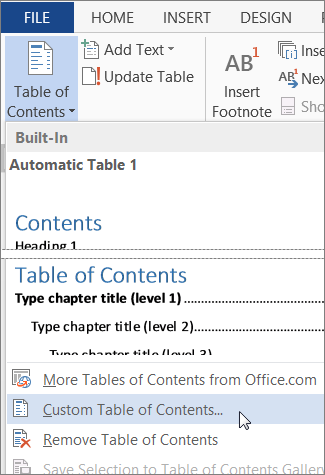
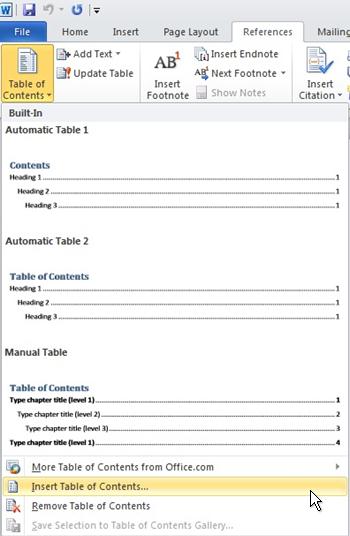
On the References tab of the Ribbon click Table of Contents > Custom Table of Contents.
-
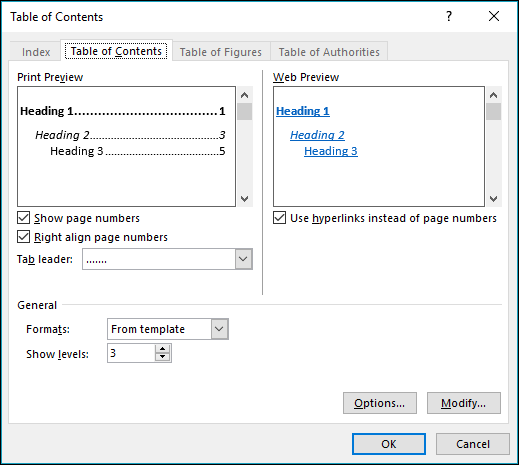
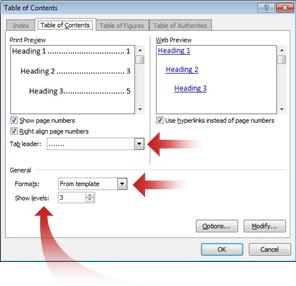
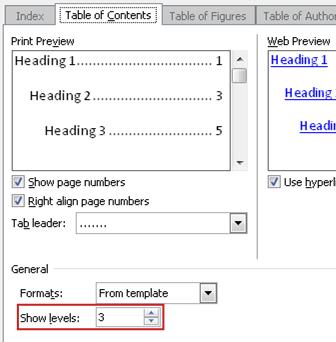
Make your changes in the Table of Contents dialog box. You'll see what they look like in the Print Preview and Web Preview areas.
-
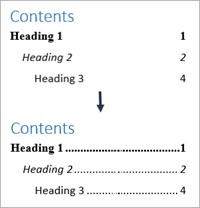
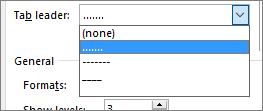
To add a dot leader, or dotted line, between each entry and its page number, click the Tab leader list and then click the dotted line. You can also choose a dash leader or remove the leader entirely and just have a blank space.
-
To change the overall appearance of your table of contents, click the Formats list, and then click the format that you want.
-
To change the number of levels displayed in your table of contents, click Show levels, and then click the number of levels you want.
Tip: "Levels" in this context refers to your heading levels. You may have Heading 1 for your major headings then Heading 2 for your subsections of those headings. You can have even more sub-levels within those that in your table of contents if you choose.
-
-
Click OK.
What else would you like to do?
Format the text in your table of contents
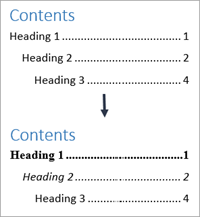
To change how the text in your table of contents looks, change the style for each level in the table of contents.
-
On the References tab of the Ribbon click Table of Contents > Custom Table of Contents.
-
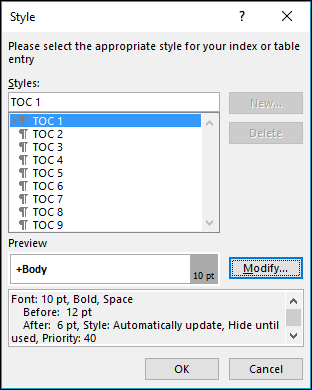
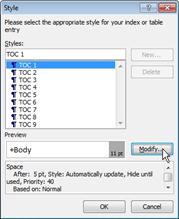
In the Table of Contents dialog box, click Modify. If the Modify button is grayed out, change Formats to From template.
-
In the Styles list, click the level that you want to change and then click Modify.
-
In the Modify Style dialog box, make the formatting changes that you want, and then click OK.
-
Repeat steps 3 and 4 for all the levels that you want to display in your table of contents.
Word will remember these customizations each time you update the table of contents in this document.
Change the level of an entry
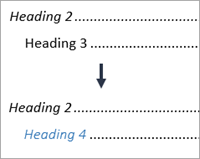
To change the level of an entry in your table of contents, just change the heading level of that text in the body of your document.
-
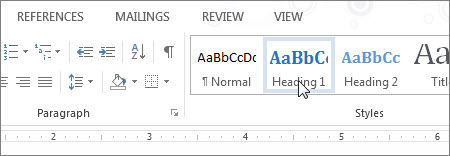
Click the heading that you want to change.
-
On the Home tab, in the Styles group, click the heading level you want.
-
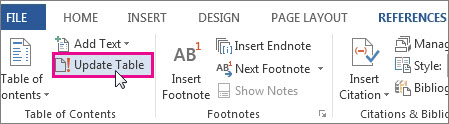
On the References tab, click Update Table.
-
Click Update entire table, and then click OK.
Add dot leaders to your table of contents
If you've already added a table of contents to your document, the following procedure will replace it with a new table of contents that contains the same information and has dot leaders, or dotted lines, between the entries and the page numbers.
-
Click References > Table of Contents > Custom Table of Contents.
-
In the Table of Contents dialog box, in the Tab leader list, click the dotted line option.

Change the number of levels shown
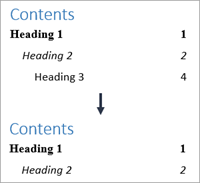
To change the number of levels shown in your table of contents is to replace the existing table with one that contains the levels you want. A shorter, but more technical way to do it is to edit the field code information.
-
Click References > Table of Contents > Custom Table of Contents.
-
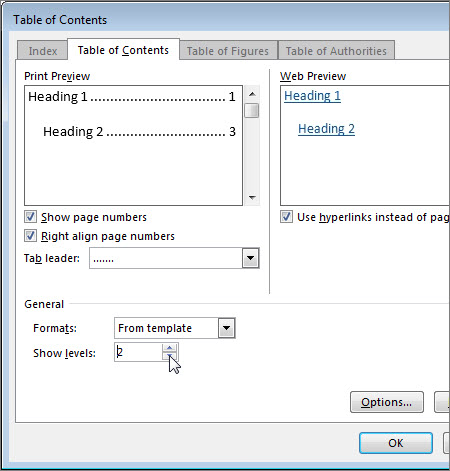
In the Table of Contents dialog box, in the Show levels list, choose the number of levels that you want, and then click OK.

For example, if you click 2, then all text with the Heading 1 style or the Heading 2 style applied is displayed in the table of contents.
-
When you are asked whether you want to replace the existing table of contents, click Yes.
Edit the field code information (to change the number of levels)
Word inserts fields automatically when you use particular commands. For example, when you Add page numbers, Word inserts the Page field. When you Create a table of contents, Word inserts the TOC field.
You can edit the field code information to quickly change the number of levels shown in your TOC.
-
Click in your table of contents, and then press Alt+F9. The field code information appears between curly brackets and looks like this:

-
Change the numbers in the quotation marks. For example, if you want to show only two levels, change "1-3" to "1-2".
-
Press Alt+F9 to display the table of contents again.
-
Update the table of contents to see your changes (References > Update Table).
If you'd like to learn more about field codes, read Field codes in Word.
For basic instructions on editing a table of contents, see Insert a custom table of contents below.
Here are some other ways you can edit your table of contents.
Format the text:
Change the level of an entry:
Add dot leaders:
Change the number of levels shown:
Insert a custom table of contents
If your document already includes a table of contents, this procedure will replace it with your customizations.
-
On the References tab, in the Table of Contents group, click Table of Contents, and then click Insert Table of Contents.
The Table of Contents dialog box opens.
-
Do any of the following:
-
To add a dot leader, or dotted line, between each entry and its page number, click the Tab leader list and then click the dotted line.
You can also choose a dash leader.
-
To change the overall appearance of your table of contents, click the Formats list, and then click the format that you want.
You can see what the different formats will look like in the Print Preview box.
-
To change the number of levels that are displayed in your table of contents, click Show levels, and then click the number of levels that you want to show.
-
What else would you like to do?
Here are some more ways you can edit your table of contents. Choose an option from the list below for step-by-step instructions.
Format the text in your table of contents
To change the formatting of the table of contents that Word generates, you need to change the style for each level in the table of contents. This is separate from the styles that you applied to the headings in your document.
After you make the changes you want to the style, Word uses that style each time it updates the table of contents.
-
On the References tab, in the Table of Contents group, click Table of Contents, and then click Insert Table of Contents.
-
In the Table of Contents dialog box, click Modify.

-
In the Styles list, click the level that you want to change, and then click Modify.
-
In the Modify Style dialog box, make the formatting changes that you want, and then click OK.
-
Repeat steps 3 and 4 for all the levels that you want to display in your table of contents.
Change the level of an entry
To change the level of an entry in your table of contents, you need to change the heading level of that text in the body of your document.
-
Click the heading that you want to change.
-
On the Home tab, in the Styles group, click the heading style that corresponds to the level you want.
-
On the References tab, in the Table of Contents group, click Update Table.
-
Click Update entire table, and then click OK.
Add dot leaders to your table of contents
If you've already added a table of contents to your document, the following procedure will replace it with a new table of contents that contains the same information and has dot leaders, or dotted lines, between the entries and the page numbers.
-
On the References tab, in the Table of Contents group, click Table of Contents, and then click Insert Table of Contents.
-
In the Table of Contents dialog box, in the Tab leader list, click the dotted line option.
Change the number of levels shown
-
On the References tab, in the Table of Contents group, click Table of Contents.
-
Click Custom Table of Contents.
-
In the Table of Contents dialog box, in the Show levels list, click the number of levels that you want in your table of contents.
For example, if you click 2, then all text with the Heading 1 style or the Heading 2 style applied is displayed in the table of contents.
-
When you are asked whether you want to replace the existing table of contents, click Yes.
Do you have a question about Word that we didn't answer here?
Post a question on the Word Answers forum.
Help us improve Word
Do you have suggestions about how we can improve tables of contents (or any other feature) in Word? If so, please visit Word User Voice and let us know!
See also
Format or customize a table of contents in Word 2016 for Mac
No comments:
Post a Comment