Add East Asian fonts in Windows 10 for use with Office documents
If someone creates a document on a computer with an East Asian language version of Office, that document might look different when shared with someone else who does not have East Asian fonts installed on their computer. Office programs will substitute the original font with the closest available installed font, which may result in odd spacing between characters. You can add the language you need for the fonts to display correctly.
Although it can occur with any language, a font conflict is most likely to occur with users of the new East Asian fonts that come with Office 2016, because users of earlier versions of Office will not have these fonts installed.
Note: In Office 2016, the new default font for the Simplified Chinese version of Excel, Word, PowerPoint, Outlook, and OneNote is Dengxian. If you're using Office 2010 or Office 2013, you can install the Dengxian font pack from the Microsoft Download Center.
To add the East Asian fonts, you need to install the East Asian language. Installing the East Asian language does not necessarily change the default language you use with Windows; it simply adds the East Asian language as an additional language and downloads the related fonts.
Add a language and associated fonts
-
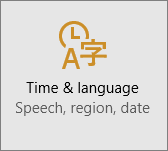
Click the Windows Start button, click Settings, and then click Time & language.

-
Click Region & language, and then click Add a language.

-
Click the language for the font you want to add. Any fonts associated with that language will be downloaded, and your text should display correctly.
See Also
Changing your language or keyboard
Language Accessory Pack for Office 2016
No comments:
Post a Comment