Send an IM from Lync Web App
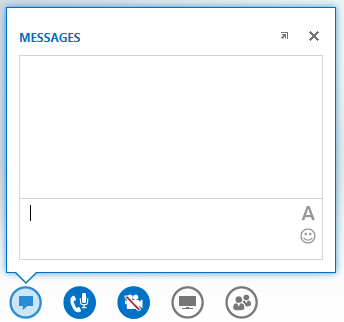
During a Lync Meeting, click the IM icon to type an instant message (IM). Type in the bottom part of the message input area and press Enter to send the message. Your message will go to all the meeting participants. From Lync Web App, you cannot send an IM to a specific meeting participant, or to anyone who is not a meeting participant. Also, you cannot send images (except emoticons) or files as IMs.

Both outgoing and incoming messages appear in the message history pane at the top of the IM window with the sign-in name of the sender, and a time stamp for when the message was sent.
Related tasks
Dock the IM window
By default, the IM window in Lync Web App is not displayed. If you don't see it, point your mouse to the IM icon to see a preview of the IM window, or click the icon to open the IM window. If you opened the preview, it will stay open until you click elsewhere on the screen. You can click the arrow icon on the top right of the preview to pin the IM window to the left side of the meeting room.
Format a message
The formatting of the messages you send is determined by the format of the last character you type in the message. This means that if all the text you type is in one font but only the last character is in a different font, the message is sent using the different font. Your font choice affects only the messages you send, not those of the person who receives and responds to them.
To select formatting options, click the Change text color, font and other formatting icon in the message input area to choose the color, font, size, and font style for all the text you type. You can change your choices for each message. However, your choices will remain in place for the current meeting only, and only on the device you used to set it. If the font of an incoming message is different from what it was sent with, it might be because your browser doesn't support the font.
In Lync Web App, you can format a paragraph of text but not individual letters, words, or phrases. You can't copy text from the message history pane to reuse it, or save a copy of all the instant messages exchanged during a meeting.
Add emoticons to a message
Click the Select an emoticon icon in the message input area, and click the emoticon you want. The typographical equivalent of the emoticon, for example :) for the smiley, appears in your message. When you press Enter and send the message, the emoticon will appear in the message history pane.
Tip: If you know the typographical equivalent of the emoticon you want to add, you can type it directly into your message.
No comments:
Post a Comment