Plan your Web site with Visio shapes
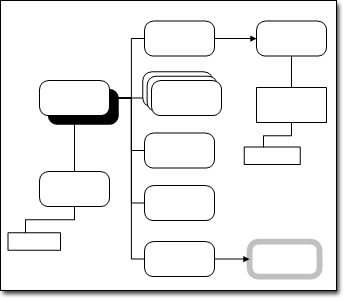
A well-organized Web site begins with a plan. The first step in developing this plan is to brainstorm about the big picture ― the site's purpose, content, and overall organization. You can stimulate this discussion by creating a high-level, conceptual diagram of your new Web site using the Conceptual Web Site template. You can also use this type of diagram to help reorganize an existing site.

The Conceptual Web Site template opens three stencils:
-
Conceptual Web Site Shapes These shapes represent general content, such as pages, page groups, and related pages.
-
Web Site Map Shapes These shapes represent specific content, such as ActiveX controls, files, multimedia, and images.
-
Callouts These shapes annotate your diagram.
Create a Conceptual Web site map
-
On the File menu, point to New, point to Software and Database, and then click Conceptual Web Site.
-
Click the connector tool
 on the Standard toolbar.
 -
Drag the Main object shape onto the drawing page from Conceptual Web Site Shapes.
-
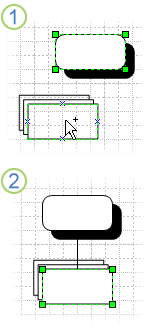
With the Main object shape selected, drag another shape onto the drawing page.
The shapes connect. Each new shape connects to the shape that is currently selected.

1. With one shape selected, drag another onto the page.
2. The two automatically connect.
-
Continue dragging shapes onto the drawing page and connecting them until you've completed your diagram.
-
If you want, you can annotate the diagram.
-
From Callouts, drag the callout shape you want to use onto the drawing page.
-
To connect the callout shape to the shape with which the callout information is associated do one of the following:
-
Drag an end point
 on the callout shape to a connection point
  on the shape with which the callout information is associated.
 -
Drag an end point on the callout shape to the center of the shape with which the callout information is associated.
A red outline indicates a proper connection.
-
-
Double-click the callout shape to enter text. You can also adjust the width of the callout text block by dragging the callout shape's selection handles
 .
.
-
-
Align and distribute the shapes in your diagram to fine-tune it.
No comments:
Post a Comment