Manage, view, or delete SharePoint alerts
Alerts are notifications of changes to content on a site that you receive as e-mail messages or text messages to your mobile phone, depending on how your site is configured. You can use either the User Information page or the Manage Alerts on this Site page to view and cancel your alerts and change the settings for your alerts. If you have permission to manage a site, you can also view and cancel alerts for other people by using the User Alerts page.
This article focuses on how to manage or delete alerts for yourself and for other people if you are a site administrator.
Updated March 13, 2017.
View and cancel an alert for myself on SharePoint Online
-
In the list or library where you've set the alerts, click the Ellipses (...), and then click Manage My Alerts .
-
In My Alerts on this site, select the checkbox next to the alert you want to delete.
-
Click Delete Selected Alerts and then click OK.
View or cancel an alert for another person on SharePoint Online
-
Click Settings
 , and then click Site Settings.
 -
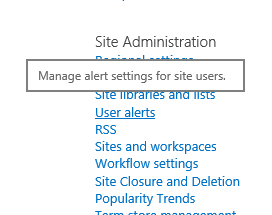
Under Site Administration, click User alerts.

-
Click Display alerts for to select a user, and then click Update.
-
Select the checkbox next to the alert you want to delete, and then click Delete Selected Alerts.
-
Click OK.
View and cancel an alert for myself on SharePoint 2016, 2013, or 2010
-
In the list or library where you've set the alerts, click the List or Library tab.
-
Click Alert Me, and then click Manage My Alerts.
-
In My Alerts on this site, select the checkbox next to the alert you want to delete.
-
Click Delete Selected Alerts and then click OK.
View or cancel an alert for another person on SharePoint 2016, 2013, or 2010
-
Click Settings
 or Site Actions
  , and then click Site Settings.
 -
Under Site Administration, click User alerts.
-
Click Display alerts for to select a user, and then click Update.
-
Select the checkbox next to the alert you want to delete, and then click Delete Selected Alerts.
-
Click OK.
View or cancel an alert for myself on SharePoint 2007
Note: Depending on how your site and servers are set up, your alert e-mail message may contain links to the settings for the alert. You can click this link to open the alert settings, instead of having to browse for alert settings on the site.
-
At the top of the site, click Welcome User name
 , and then click My Settings.
 -
Click My Alerts.
-
Select the check box next to the alert or alerts that you want to cancel.
-
Click Delete Selected Alerts.
-
When you are prompted to confirm the deletion, click OK, if you are sure that you want to cancel the selected alerts.
View or cancel an alert for another person on SharePoint 2007
To cancel an alert for someone else, you must have permission to manage site settings.
-
.On the Site Actions menu
 , click Site Settings, and then click Modify All Site Settings
Note: On a site for which the Site Actions menu is customized, point to Site Settings, and then click the settings that you want to view.
-
Under Site Administration, click User alerts.
-
In the list next to Display alerts for, select the person whose alerts you want to cancel.
-
Click the Update button.
-
Select the check box next to the alert or alerts that you want to cancel.
-
Click Delete Selected Alerts.
-
When you are prompted to confirm the deletion, click OK, if you are sure that you want to cancel the selected alerts.
Unsubscribe to an RSS Feed
You can cancel a subscription to an RSS Feed for a SharePoint list, library, or view by following the instructions in your RSS reader, e-mail program, or browser. For more information, see Help in the reader or program.
We're listening!
Was this article helpful? If so, please let us know at the bottom of this page. Let us know what was confusing or missing. Please include the version of SharePoint, OS, and browser you're using. We'll use your feedback to double-check the facts, add info, and update this article.
No comments:
Post a Comment