Create a map with MapPoint and Excel
You can exchange data and maps between Microsoft Office Excel and Microsoft MapPoint. This article guides you through the steps of organizing your Excel data, creating a map in MapPoint that is based on that data, and copying MapPoint data into an Excel worksheet as a bitmap.
In this article
What is MapPoint?
Microsoft MapPoint is a product that you can use to integrate maps into Office documents, including Excel worksheets. MapPoint shares much of the functionality of the Microsoft Office System, such as copying and pasting. (Microsoft MapPoint is not included with Microsoft Office. For information, see the Microsoft MapPoint Web site.)
By using a copy and paste operation, you can quickly add a map to a worksheet.
Step 1: Organize your data to get the best picture
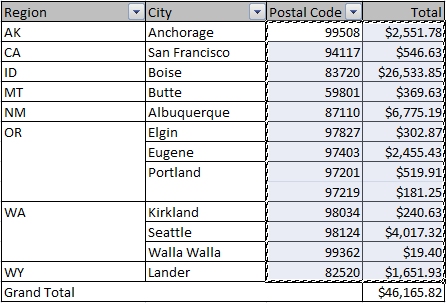
The best way to get good results in a map is to summarize your data. For example you may want to use a PivotTable report to show sales in a given month by United States postal (ZIP) codes. First select the data that you want to map, including the headings, and then press CTRL+C to copy the data.

Step 2: Make a map in Microsoft MapPoint
In MapPoint, press CTRL+V to paste the data into a map. You can start with a blank map or a map that already contains other data. MapPoint automatically recognizes geographic data and starts the Data Import Wizard. Use the wizard to select the type of map you want to create, the columns you want to show, and other customizations. When you are finished, click Finish.

Step 3: Copy a picture of the map back to Excel
On the MapPoint Edit menu, click Copy to select just the detailed map, or click Copy Map to select the detailed map and the legend that appears on the left.
Switch to Excel, open the target worksheet, and then press CTRL+V to paste the map. The map is pasted as a bitmap.
You can also link the data to the map by using the following procedure.
-
Save the map in MapPoint.
-
In Excel, click Object (Text group, on the Insert tab).

-
In the Object dialog box, click the Create from File tab.
-
Browse to the map and select the Link to file check box.
More information
For information about working with MapPoint and linking maps to data in Excel, see MapPoint Help.
See the link in the See Also section for more information about MapPoint on the Microsoft MapPoint Web site.
See the link in the See Also section for more information about using PivotTable reports in Excel 2007.
No comments:
Post a Comment