Add a check box or option button (Form controls)
You can insert form controls such as check boxes or option buttons to make data entry easier. Check boxes work well for forms with multiple options. Option buttons are better when your user has just one choice.
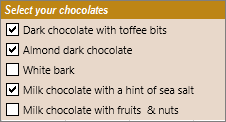
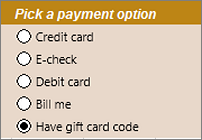
To add either a check box or an option button, you'll need the Developer tab on your Ribbon.
Notes: To enable the Developer tab, follow these instructions:
-
In Excel 2010 and subsequent versions, click File > Options > Customize Ribbon , select the Developer check box, and click OK.
-
In Excel 2007, click the Microsoft Office button
 > Excel Options > Popular > Show Developer tab in the Ribbon.
-
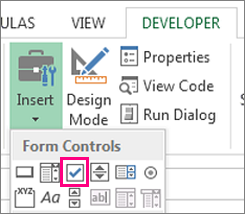
To add a check box, click the Developer tab, click Insert, and under Form Controls, click
 .
.
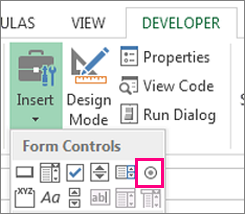
To add an option button, click the Developer tab, click Insert, and under Form Controls, click
 .
.
-
Click in the cell where you want to add the check box or option button control.
Tip: You can only add one checkbox or option button at a time. To speed things up, after you add your first control, right-click it and select Copy > Paste.
-
To edit or remove the default text for a control, click the control, and then update the text as needed.
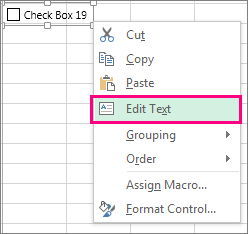
Tip: If you can't see all of the text, click and drag one of the control handles until you can read it all. The size of the control and its distance from the text can't be edited.
Formatting a control
After you insert a check box or option button, you might want to make sure that it works the way you want it to. For example, you might want to customize the appearance or properties.
Note: The size of the option button inside the control and its distance from its associated text cannot be adjusted.
-
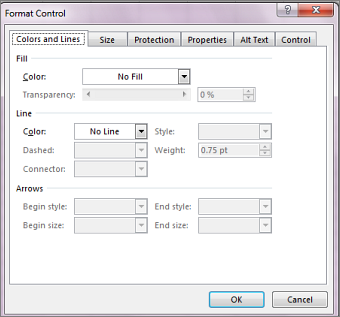
To format a control, right-click the control, and then click Format Control.
-
In the Format Control dialog box, on the Control tab, you can modify any of the available options:
-
Checked: Displays an option button that is selected.
-
Unchecked: Displays an option button that is cleared.
-
In the Cell link box, enter a cell reference that contains the current state of the option button.
The linked cell returns the number of the selected option button in the group of options. Use the same linked cell for all options in a group. The first option button returns a 1, the second option button returns a 2, and so on. If you have two or more option groups on the same worksheet, use a different linked cell for each option group.
Use the returned number in a formula to respond to the selected option.
For example, a personnel form, with a Job type group box, contains two option buttons labeled Full-time and Part-time linked to cell C1. After a user selects one of the two options, the following formula in cell D1 evaluates to "Full-time" if the first option button is selected or "Part-time" if the second option button is selected.
=IF(C1=1,"Full-time","Part-time")
If you have three or more options to evaluate in the same group of options, you can use the CHOOSE or LOOKUP functions in a similar manner.
-
-
Click OK.
-
Right-click the control, and press DELETE.
No comments:
Post a Comment