Lay out a newsletter in publishing layout view
You can lay out a complex publication in publishing layout view and create elements that appear on all pages by putting them on a master page. After you save the document as a template, you can create a new version of the document that is based on the template, and then revise its content. The template keeps the layout the same.
In the following example, you create a monthly newsletter that has recurring elements. Most of the content in the newsletter (for example, the text and articles) changes every time that you publish it. However, the layout and photo formatting is consistent from one edition to the next. You also create elements that appear on every page, such as a company logo and a legal disclaimer. To complete these steps, you must have some photos and a picture to import, such as a company logo.
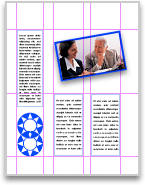
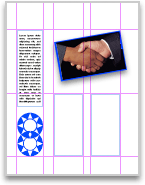
Assume that you want the newsletter to have the layout that is shown in the following example:
Newsletter layout that shows layout guides and image drop zones
Step 1: Set up master pages
A master page contains text or pictures that appear on every page that is based on that master page. Master pages can also include layout guides. You can use these guides across multiple pages to make sure that placement of pictures, text box, and other elements is consistent.
Set up guides
Assume that you want to lay out your newsletter with columns of text and graphics that are aligned. Guides can help you align these elements.
-
On the View menu, click Publishing Layout.
-
In the lower-right corner of the document window, click the Master Pages tab.
You are now viewing a master page that has no content.
-
Rest the pointer on the vertical ruler until the pointer changes to
 , and then drag a vertical guide onto the page.
Tip: After you drag a guide onto the page, you can adjust its position. Rest the pointer on the guide until it changes to
 or
or  , and then drag the guide to where you want it.
 -
Repeat step 3 and drag five more vertical guides (for a total of six) onto the master page. Position them to create three columns for text and graphics, with space between the columns and margins between the edges of the page and the columns.
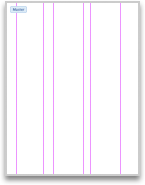
-
Drag a horizontal guide from the horizontal ruler onto the page.
-
Repeat step 5 and drag two more horizontal guides (for a total of three) onto the page, positioning them to help align the text boxes and pictures that you want to insert.
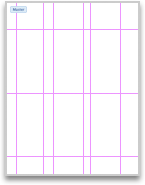
Insert and position a picture
Because the picture is located on a master page, it appears on every page of your newsletter. In this example, you add the company's logo.
-
On the Home tab, under Insert, click Picture, and then click Photo Browser or Picture from File.
-
Locate and insert the picture that you want to use (for example, logo.jpg).
-
Drag the picture to the position on your master page where you want it to appear throughout your newsletter. To align it, use the guides that you created.
In this case, drag the logo to the lower-left corner of the page between the guides that you created.
Add a text box for a sidebar
This sidebar text, a legal disclaimer, appears on the left side of each page, above the company's logo.
-
On the Home tab, under Insert, click Text Box.

-
On the master page, drag to add a text box between the two vertical guides in the left column, above the logo.
Tip: To see the boundaries of the text box and all other text regions in the document, on the Word menu, click Preferences, click View, and then under Show, click Text boundaries.
-
Click the sidebar text box, and type the text that you want to appear above the company's logo on every page (for example, a legal disclaimer).
-
In the lower-right corner of the document window, click the All Contents tab.
The master page closes, and you are now viewing a regular page.
Step 2: Add a picture and make it an image drop zone
You can maintain a consistent look for imported pictures by using image drop zones. An image drop zone applies a consistent look to any image that is dropped on to it. When you update the newsletter, you can drag a new picture to an image drop zone to quickly apply the appropriate scaling, rotation, decorative effects, and any other transformations that you want.
Insert and position a picture
-
On the Home tab, under Insert, click Picture, and then click Photo Browser or Picture from File.
-
Locate and insert the picture that you want to use in the newsletter.
-
Drag the picture to the location that you want.
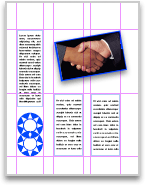
In this example, the picture is positioned at the top of two columns of text.
Apply formatting and transformations to a picture
By using image drop zones, transformations and effects that you apply to the original picture are automatically applied to any pictures that you drag to the drop zone in the future. In this example, you resize the picture, rotate it 10 degrees counterclockwise, and apply a shadow to the frame. Any pictures that you drag to the drop zone in the future are also resized, rotated 10 degrees counterclockwise, and have the same shadow applied.
-
To resize the picture, click the picture, rest the pointer on a corner of the picture until the pointer changes to
 or
or  , and then drag the corner.
 -
To rotate the picture, click it, and then click and drag the rotation handle
 .
. -
To apply a shadow, click the picture, click the Format Picture tab, and then under Picture Styles, click Effects, and click an option under Shadow (for example, Outside Right).
Convert the image to a drop zone
You can use your picture without applying any additional formatting. However, by converting the picture to a drop zone, you can replace the picture in future issues and maintain a consistent look.
-
Click the picture, and then on the Format menu, click Picture.
-
Click Layout, and then click Advanced.
-
On the Position tab, under Options, select the Placeholder check box.
-
Click OK.
-
Click OK again.
To change the picture in the drop zone, press CONTROL , and then click the picture. Click Change Picture, and then insert the picture that you want to use.
Step 3: Save your document as a reusable template
Now that the framework for your document is finished, it is time to save the document as a template so that you can use the framework repeatedly to create future issues of the newsletter. After you save a document as a template, you can create new documents that are based on the template and then change the content of the new document. The contents of the template remain unchanged.
-
On the File menu, click Save As.
-
In the Save As box, type the name that you want to use for your document — Newsletter, for example.
-
On the Format pop-up menu, click Word Template (.dotx).
Unless you select a different location, Word saves the template file in the following folder: /Users/ username/Library/Application Support/Microsoft/Office/User Templates/My Templates/.
-
Click Save.
Word saves your newsletter template, without any additional content.
-
Close the document.
You now have an empty framework for your newsletter that you can use every time that you publish a new edition.
Step 4: Create the current edition of the newsletter
To create the current edition of the newsletter, you open a new document based on the template that you created. Then you add content to the new document, leaving the template unchanged.
-
On the File menu, click New from Template.
-
In the category list under Templates, click My Templates, and then double-click Newsletter.
A new, blank document opens. It is based on the Newsletter template that you created.
-
On the Home tab, under Insert, click Text Box.

-
Using the guides for alignment, drag in the center column to add a text box.
-
Repeat steps 3 and 4 to create another text box in the right column.
-
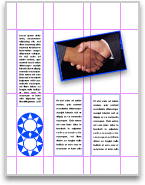
Click a text box, and then enter the text for the current edition of your newsletter.
-
Repeat step 6 for each text box.
-
In the Finder, open a folder that contains a picture that you want to include in this edition of the newsletter.
-
Drag the picture from the Finder to the image drop zone in the newsletter.
The new picture replaces the one that was in the image drop zone. Word preserves the size, rotation, transformation, effects, and other formatting that you used when you created the image drop zone.

-
Add or delete any text or pictures, and then make any other changes that you want.
-
On the File menu, click Save.
Make sure that you type a name for the current edition in the Save As box — June Newsletter, for example.
See also
Add elements that repeat on every page
No comments:
Post a Comment