Add an email account to Outlook
To send and receive your email in Outlook, you'll first need to add your email account to Outlook. You can add one or more email accounts, including Office 365 accounts, Exchange, Outlook.com, Gmail, Yahoo, iCloud, or other third-party email accounts.
Note: AOL and Verizon customers who need to update their account settings after AOL's recent change to their server settings should see the section Update your email settings in Outlook for PC. When checking your encryption settings, make sure they're set to SSL, SSL/TLS, or Auto and not TLS only.
Add an email account quickly

Many email accounts can be added using Outlook's automatic setup option. You can use these instructions to add your first account or additional accounts.
Some email providers, like Gmail, Yahoo, and iCloud require you to turn on two-factor authentication and set up an app password. An app password is a one-time-use password that you enter instead of your email account password. Using an app password lets Gmail, Yahoo, and iCloud confirm that you're the person accessing your email. See Set up two-factor authentication for Gmail, Set up two-factor authentication for Yahoo, or Set up two-factor authentication for iCloud for information on how to generate an app password. Use that app password in steps 2 and 3 below.
Note: For all email accounts, your username is your full email address.
-
Open Outlook and select File > Add Account.
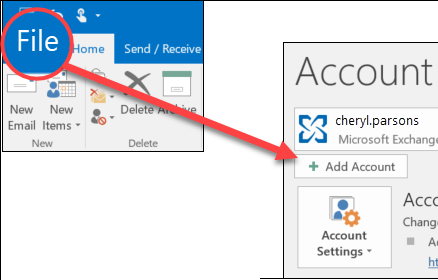
Note: Outlook 2007 users should select Tools > Account Settings. On the Email tab, select New.
-
For Outlook 2016, enter your email address, then select Connect.
For Outlook 2013 and Outlook 2010, select Email Account and then enter your name, email address, and password. Then select Next. -
If prompted, enter your password again, then select OK, and Finish to start using Outlook.
Note: You can use these steps to add your first account to Outlook or additional accounts.
Update your email settings in Outlook for PC

Sometimes you need to make a change to your email account settings. If you have a new password, if your email provider has asked you to change settings, or if you're having problems with sending and receiving email, you can change your email account settings in a few steps.
-
Open Outlook and select File > Account Settings > Account Settings.
-
Select the email account you want to change, then select Change.
-
On the settings page, you can update your incoming and outgoing server names, your email address, your name, your user name, and your password. If you need to change your SSL settings or your port settings, select More Settings.
-
The most common settings to update are on the Outgoing Server tab and the Advanced tab.
-
If you're having problems sending email or are receiving messages about your outgoing server, make sure the box for My outgoing server (SMTP) requires authentication is checked.
-
If you need to update your incoming or outgoing server ports or SSL settings, use the Advanced tab.
Note: For AOL and Verizon customers: selecting SSL/TLS from the drop-down boxes under incoming and outgoing server encrypted connections will ensure you can still send and receive email after November 7, 2017.
-
-
When you're done updating your settings, select OK > Next > Finish.
Use advanced setup to add an email account in Outlook for PC

If you need to enter specific values for incoming and outgoing server names, port numbers, or SSL settings, you can use Outlook's advanced setup option.
-
Open Outlook and select File > Add Account.
-
On the next screen, enter your email address, select Advanced options, then check the box for Let me set up my account manually and select Connect.
-
Select your account type. Most of the time when you need to use this option, you'll select IMAP.
-
The Account settings screen should be pre-populated with most of the account settings you need. However, if you need to look up your settings, see the POP and IMAP account settings topic. Enter your incoming and outgoing server settings and then select Next.
-
Enter your password and then select Connect.
Note: AOL and Verizon customers who need to update their account settings after AOL's recent change to their server settings should see the section Update your email settings in Outlook for Mac. When checking your encryption settings, make sure they're set to SSL, SSL/TLS, or Auto and not TLS only.
Add a new account quickly
Most email accounts, including Office 365, Exchange server accounts, Outlook.com, Hotmail.com, and Live.com accounts can be set up in a few quick steps.
-
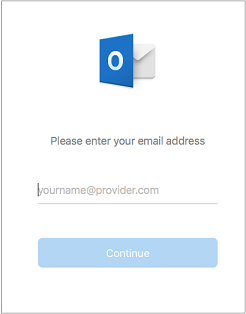
Type your email address > Continue.
-
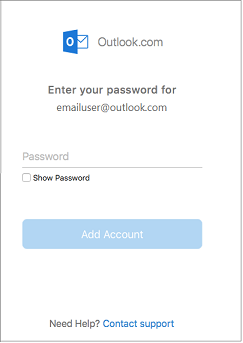
Type your password > Add Account. (Your screen might look different from this one depending on the account you're adding.)
-
Select Done to start using Outlook 2016 for Mac.

Update your email settings in Outlook for Mac

Sometimes you need to make a change to your email account settings. If you have a new password, if your email provider has asked you to change settings, or if you're having problems with sending and receiving email, you can change your email account settings in a few steps.
-
Open Outlook and select Tools > Accounts.
-
Select the email account you want to change, then select Change.
-
On the settings page, you can update your incoming and outgoing server names, your email address, your name, your user name, and your password. If you need to change your SSL settings or your port settings, select More Settings.
-
The most common settings to update are on the Outgoing Server tab and the Advanced tab.
-
If you're having problems sending email or are receiving messages about your outgoing server, make sure the box for My outgoing server (SMTP) requires authentication is checked.
-
If you need to update your incoming or outgoing server ports or SSL settings, use the Advanced tab.
Note: For AOL and Verizon customers: selecting SSL/TLS from the drop-down boxes under incoming and outgoing server encrypted connections will ensure you can still send and receive email after November 7, 2017.
-
-
When you're done updating your settings, select OK > Next > Finish.
Add more accounts
After your first account is set up, follow these steps to add all subsequent email accounts.
-
Open Outlook 2016 for Mac.
-
Select Tools > Accounts.
-
Click the plus (+) sign > New Account.
-
Enter the email address of the account.
-
Follow the prompts to complete the account setup.
Set up two-factor authentication for Gmail
-
Go to Gmail from your browser, then select the Google apps icon in the upper right corner of the screen.

-
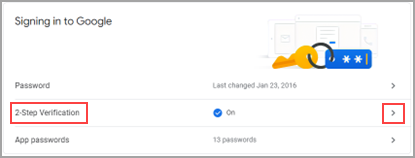
Select My Account. Under Sign-in & security, select Signing in to Google.
-
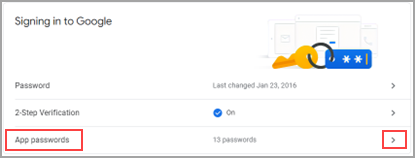
Under Password & sign-in method, if 2-Step Verification is ON, skip to the next step. Otherwise, select 2-Step Verification and follow the prompts. When you're done, select the back arrow at the top of the screen.

-
Under Password & sign-in method, select App passwords.
-
Enter your Google password and then select Sign in. At the bottom of the next screen, select Mail and Windows Computer from the drop-down lists, then select Generate.

-
Google will display an app password for you. Make a note of this password (without the spaces) and use this as the password when adding a new account to Outlook.

Set up two-factor authentication for Yahoo
-
Go to the Yahoo website from your browser and select the settings icon in the upper right corner of the screen.

-
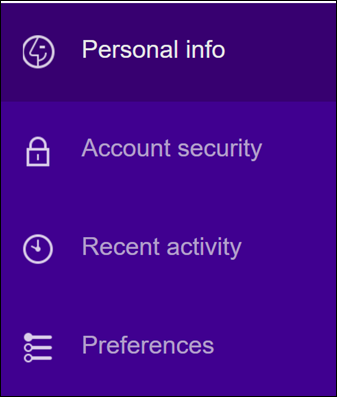
Select Account info > Account security. You may need to sign in again.
-
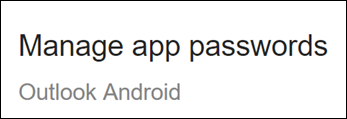
If Two-step verification isn't turned on, you'll need to do that before you continue. Then select Manage app passwords.
-
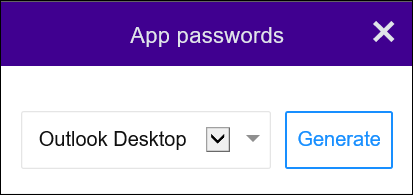
Select Outlook Desktop from the drop-down list, and then select Generate.
-
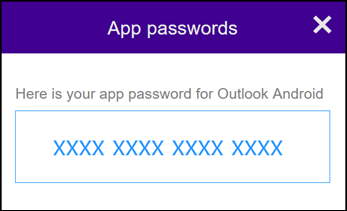
Yahoo will display an app password for you. Make a note of this password (without the spaces) and use this as the password when adding a new account to Outlook.
Set up two-factor authentication for iCloud
-
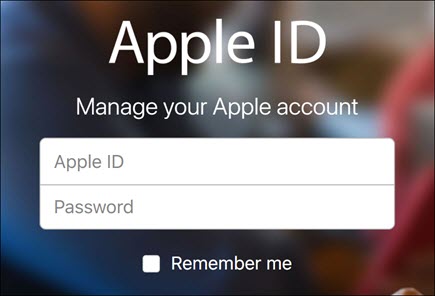
Go to the Apple ID website from your browser and enter your Apple ID and password.
-
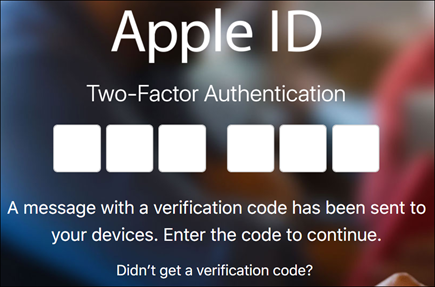
If you've already turned on two-factor authentication, you'll receive a code on one of your devices. Enter this code to continue. Otherwise, turn on two-factor authentication.
-
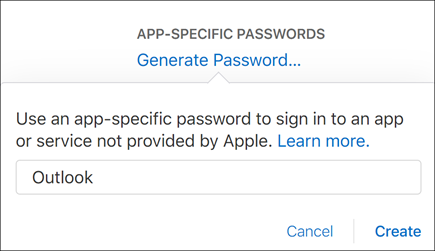
In the Security section, under APP-SPECIFIC PASSWORDS, select Generate Password...
-
Enter a name for your password, such as Outlook, and select Create.
-
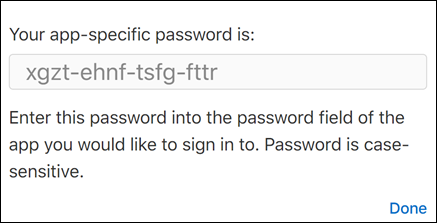
Apple will display an app password for you. Make a note of this password (without the spaces) and use this as the password when adding a new account to Outlook.
ReplyDeleteNice blog, your article explain very well about how to create group in outlook. But every industry or a professional business person required updated and lifetime Microsoft office subscription. Microsoft Office 365 Professional Plus comes with life time subscription plan with up to date software update. It offers you latest and upgraded version of Excel, PowerPoint, OneNote, Outlook, Publisher, Access, OneDrive, and Skype for Business.
Microsoft Office Tutorials: Add An Email Account To Outlook >>>>> Download Now
Delete>>>>> Download Full
Microsoft Office Tutorials: Add An Email Account To Outlook >>>>> Download LINK
>>>>> Download Now
Microsoft Office Tutorials: Add An Email Account To Outlook >>>>> Download Full
>>>>> Download LINK 30
Hi, I want to express my gratitude to you for sharing this fascinating information. It's wonderful that we now have the ability to share our thoughts. through blogs and internet services, I felt the same way, keep sharing more posts on this side with us in the future.
ReplyDeleteSkype bellen
I want you to keep providing such information, I learned something out of your knowledge, I hope to keep sharing such information thank you.
ReplyDeletevisit site
Microsoft Office Tutorials: Add An Email Account To Outlook >>>>> Download Now
ReplyDelete>>>>> Download Full
Microsoft Office Tutorials: Add An Email Account To Outlook >>>>> Download LINK
>>>>> Download Now
Microsoft Office Tutorials: Add An Email Account To Outlook >>>>> Download Full
>>>>> Download LINK Nk
Really Appreciable Article, Honestly Said The Thing Actually I liked The most is the step-by-step explanation of everything needed to be known for a blogger or webmaster to comment, I am going show this to my other blogger friends too.
ReplyDeletePayPal Bellen
Thank you for this useful information. Really helpful.
ReplyDeleteOutlook bellen