Protect confidential e-mail information using IRM in Outlook 2007
Microsoft Office Outlook 2007 Inside and Out
By Jim Boyce
Jim Boyce is a highly-regarded expert on operating systems and productivity software who's written or contributed to more than 50 books. A former contributing editor for Windows Magazine, Jim writes for several technical publications and Web sites.
To learn more about other books on the 2007 Microsoft Office system, visit Microsoft Press.
In this article
In response to market demands for a system with which companies can protect proprietary and sensitive information, Microsoft has developed an umbrella of technologies called Information Rights Management (IRM). This article explains how Microsoft has incorporated IRM into Microsoft Office Outlook 2007, enabling you to send messages that prevent the recipient from forwarding, copying from, or printing the message. The recipient can view the message, but the features for accomplishing these other tasks are unavailable.
Understanding IRM
IRM is an extension for the Microsoft Office system applications of Windows Rights Management. There are two paths to implementing IRM with the Microsoft Office system. Microsoft offers an IRM service that, as of this writing, is free. This path requires that you have a Microsoft Passport to send or view IRM-protected messages. You must log in to the service with your Passport credentials to download a certificate, which Office Outlook 2007 uses to verify your identity and enable the IRM features. The second path is to install Microsoft Windows Server 2003 running the Rights Management Service (RMS) on Windows Server 2003. With this path, users authenticate on the server with NTLM or Passport authentication and download their IRM certificates.
The first path provides simplicity because it does not require that organizations deploy an RMS server. The second path provides more flexibility because the RMS administrator can configure company-specific IRM policies, which are then available to users. For example, you might create a policy template requiring that only users within the company domain can open all e-mail messages protected by the policy. You can create any number of templates to suit the company's data rights needs for the range of Microsoft Office system applications and document types.
Not everyone who receives an IRM-protected message will be running Outlook 2003 or Outlook 2007, so Microsoft has developed the Rights Management Add-On for Internet Explorer, which enables these users to view the messages in Internet Explorer. Without this add-on, recipients cannot view IRM-protected messages. With the add-on, recipients can view the messages, but the capability to forward, copy, or print the message is disabled, just as it is in Outlook 2007.
The following sections explain how to configure and use IRM in Outlook 2007 with the Microsoft IRM service. As of this writing, Windows Rights Management Services is available for Windows Server 2003 by download (currently as a Service Pack 2 release). Check www.boyce.us and www.microsoft.com/windowsserver2003/technologies/rightsmgmt/default.mspx periodically for additional information on RMS as it becomes available.
Using Microsoft's IRM service
To configure Outlook 2007 to use the IRM service and send IRM-protected messages, follow these steps:
-
Open Outlook 2007 and start a new message. With the message form open, choose Microsoft Office Button, Permission, Do Not Forward.
-
If you do not have the IRM add-on installed, Outlook 2007 displays the dialog box shown in Figure 1. Choose Yes, I Want To Sign Up For This Free Trial Service From Microsoft and click Next.
Editor's note on Trial offers A Trial is a limited no-charge subscription to the Service. When the trial period ends, you are prompted to convert the Trial to a paid subscription. If you do not want a paid subscription after the trial period ends, you should discontinue using the Service. For more information, see Microsoft Information Rights Management Services Service Agreement & Privacy Statement.
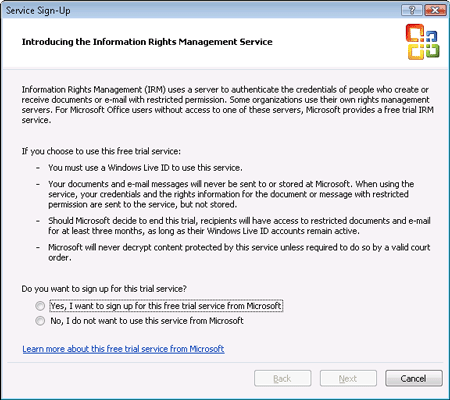
Figure 1. Choose Yes, and then click Next to start the enrollment process.
-
The wizard asks if you already have a Microsoft Passport. If so, choose Yes and click Next to open a sign-in dialog box and enter your Passport credentials. If not, choose No and click Next; then follow the prompts to obtain a Microsoft Passport.
-
After you obtain a Passport and click Next, Outlook 2007 displays the page shown in Figure 2. Choose Standard to obtain a certificate that you can use on your own computer. Choose Temporary if you need a certificate only for a limited time, such as when you are working from a public computer. Then click Next, Finish to complete the process.
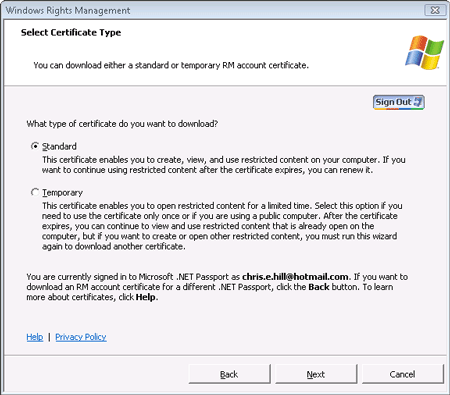
Figure 2. You can choose between a standard certificate and a temporary one.
Note: You can download a certificate for a given Passport 25 times or to 25 computers.
-
After the IRM certificate is installed on your computer, Outlook 2007 returns you to the message form. The InfoBar in the form displays a Do Not Forward message, as shown in Figure 3, indicating that the message is protected by IRM.
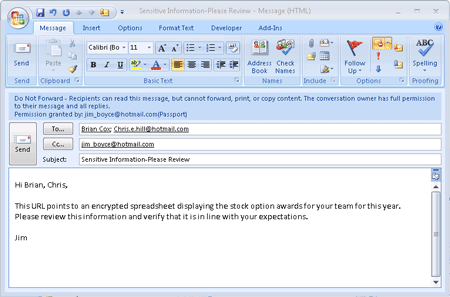
Figure 3. The InfoBar indicates when a message is protected by IRM.
-
Address the message and add the message body and attachments, if any, as you would for any other message. Then send the message.
Viewing IRM-protected messages
If you attempt to view an IRM-protected message without first obtaining a certificate, Outlook 2007 gives you the option of connecting to Microsoft's service to obtain one. After the certificate is installed, you can view the message, but Outlook 2007 indicates in the InfoBar (both Reading Pane and message form) that the message is restricted (see Figure 4). The commands for forwarding, copying, and printing the message are disabled.
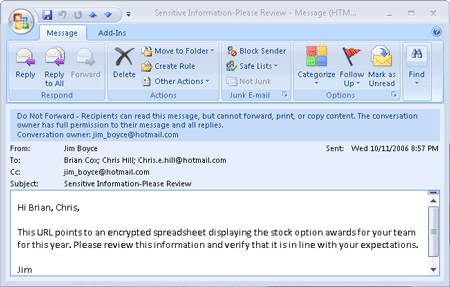
Figure 4. The InfoBar in the Pane indicates that a message is restricted.
Working with multiple accounts
It's possible that you use more than one Microsoft Passport. If you have more than one Passport and need to choose between them when you send or view an IRM-protected message, open the message form for sending or viewing and choose Microsoft Office Button, Permission, Manage Credentials to open the Select User dialog box, as shown in Figure 5. Choose an account and click OK to use that account for the current message.
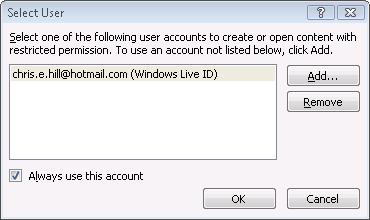
Figure 5. You can select from multiple accounts to restrict messages or view restricted messages.
If you have only one account configured on the computer and want to add another account, click Add to start the Service Sign-Up Wizard and download a certificate for another e-mail address and corresponding Microsoft Passport.

Microsoft Office Tutorials: Protect Confidential E-Mail Information Using Irm In Outlook 2007 >>>>> Download Now
ReplyDelete>>>>> Download Full
Microsoft Office Tutorials: Protect Confidential E-Mail Information Using Irm In Outlook 2007 >>>>> Download LINK
>>>>> Download Now
Microsoft Office Tutorials: Protect Confidential E-Mail Information Using Irm In Outlook 2007 >>>>> Download Full
>>>>> Download LINK v9