Add your domain and users to Office 365 operated by 21Vianet
When you're ready to use your domain (like contoso.com) with your email (like rob@contoso.com), you follow the steps in the Office 365 setup wizard to add your domain and get your services set up.
 | Ready to get started? Go to the Manage domains page now. |
Add a domain and users using Office 365 setup in the new admin center
Step 1: Verify your domain in Office 365
The first step is to verify to Office 365 that you own the domain . Otherwise, anyone could use any domain name they wanted to, including yours!
Start the wizard to be guided through the steps.
-
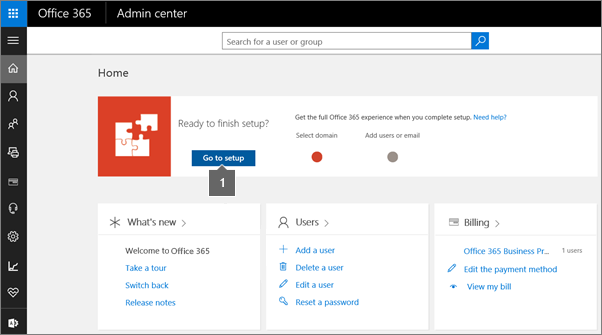
Choose Go to setup in the Office 365 Admin center to start the wizard. (Be sure to sign in to Office 365 first.)
-
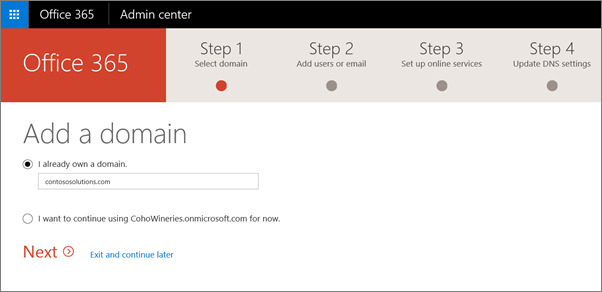
Add the domain you want to use.
-
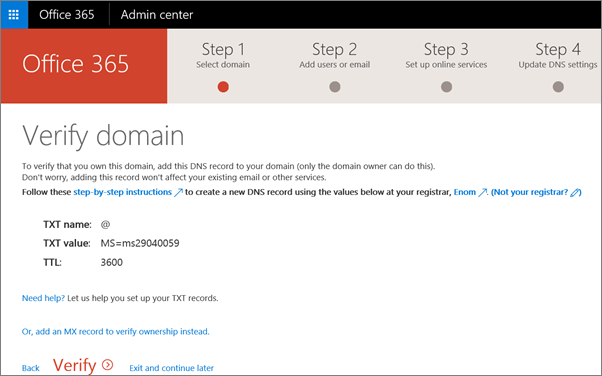
Follow the steps in the wizard to enter your custom domain name, and then add the record that verifies to Office 365 that you own the domain.
Step 2: Add ALL users who have email that use your domain
In the next step of the setup wizard, you can quickly add users (and update any current users) while you're adding your domain.
Why add or update users while you're setting up your domain? Well, you don't have to do this—unless other people use your domain for email. In that case, you must set up Office 365 mailboxes for each of those people. Otherwise they'll lose any email sent to them at your domain when you switch email for the domain over to Office 365.
-
In the Office 365 setup wizard, after you've verified your domain ownership, you'll also be prompted to add to Office 365 anyone who has an email address at your domain. Make sure you add them, so people don't lose any messages when you switch your email to Office 365! You'll switch from the initial partner.onmschina.cn domain to use your custom domain instead for sign-in and email.
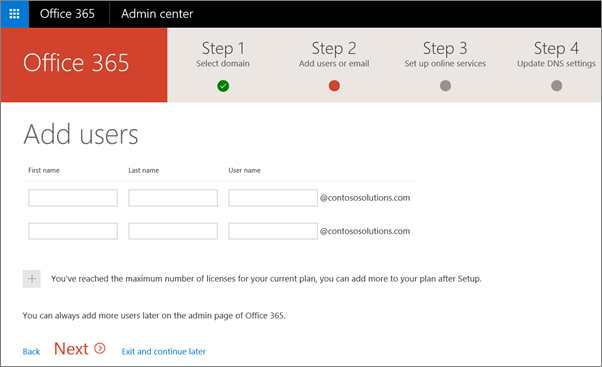
Note: Make sure you add your own email address here, if you get mail at your domain. Or you may want to switch your initial partner.onmschina.cn domain to use your custom domain instead for sign-in and email.
-
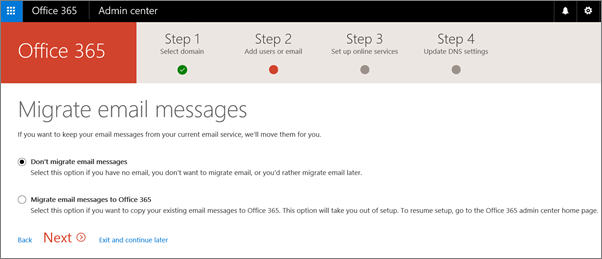
You'll also be prompted to migrate email from your previous email server. You can do it now, or migrate email, contacts, and other information later (your choice).
Step 3: Set up email and other Office 365 services with your domain
The final step is to set up your Office 365 services, including switching email for your domain to Office 365. To finish, you have to update some records at your DNS host or domain registrar. The setup wizard tells you exactly which records to update, including the values you'll need for each one, and guides you through the steps.
When you're done, email for your domain will start coming to Office 365 and your other Office 365 services, like Skype for Business Online, will also be set up.
Now, you're guided to do one of the following:
-
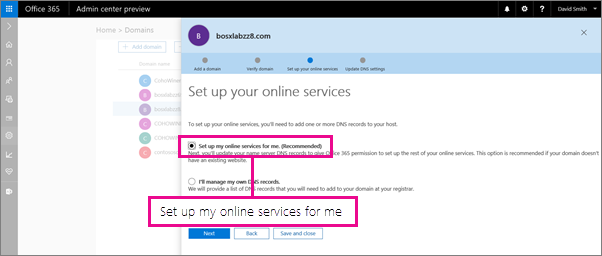
Set up my online services for me. (Recommended) Change your domain's nameserver (NS) records at your domain registrar to point to Office 365 nameservers. A good option unless you already have a website that you're using with your domain.
The setup wizard typically detects your registrar and gives you a link to step-by-step instructions for updating your NS records at the registrar website. Or change your domain's nameserver (NS) records at your domain registrar to point to Office 365 nameservers. Then Office 365 will automatically set up email and other services for you.
This changes your domain's DNS hosting to Office 365 (not recommended if you have a website with your domain, like www.contoso.com).
—OR—
-
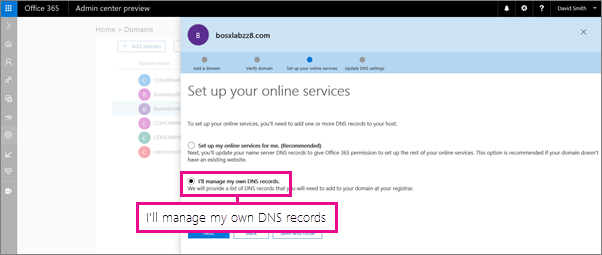
I'll manage my own DNS records. With this option, you'll go to your DNS host website and set up the records yourself, including the MX record for email. The setup wizard typically detects your DNS host and gives you a link to step-by-step instructions for updating records at their website, including screenshots and the exact values to add. Or you can follow these steps..
Add a domain and users using Office 365 setup in the old admin center
Step 1: Verify your domain in Office 365
The first step is to verify to Office 365 that you own the domain. Otherwise, anyone could use any domain name they wanted to, including yours!
Start the wizard to be guided through the steps.
-
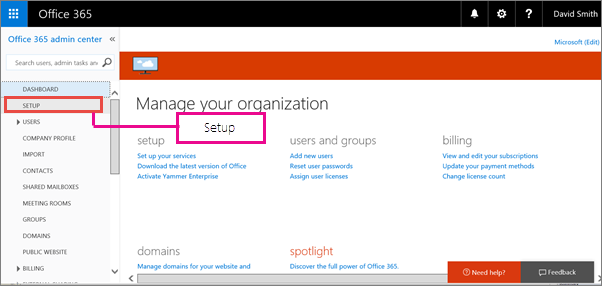
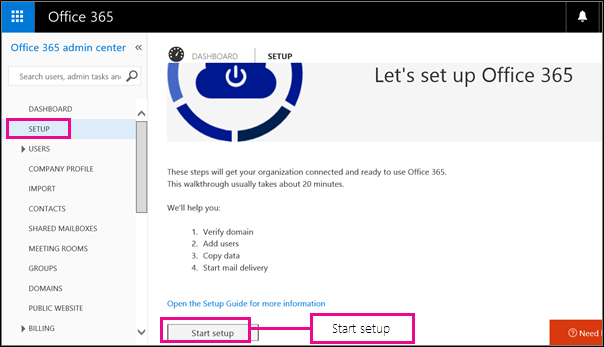
Choose Setup in the Admin center to start the wizard. (Be sure to sign in to Office 365 first.)
-
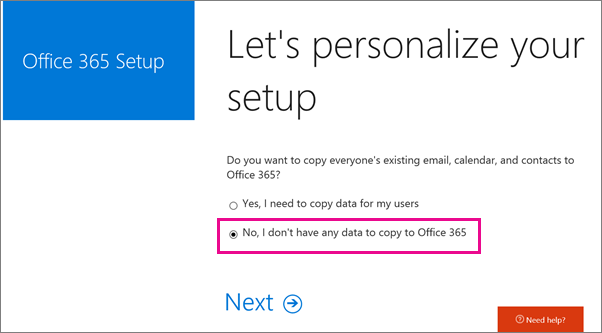
On the Let's personalize your setup page, choose No, I don't have any data to copy to Office 365 to start the setup wizard.
-
Follow the steps in the wizard to enter your custom domain name, and then add the record that verifies to Office 365 that you own the domain.
Step 2: Add ALL users who have email that use your domain
In the next step of the setup wizard, you can quickly add users (and update any current users) while you're adding your domain.
Why add or update users while you're setting up your domain? Well, you don't have to do this—unless other people use your domain for email. In that case, you must set up Office 365 mailboxes for each of those people. Otherwise they'll lose any email sent to them at your domain when you switch email for the domain over to Office 365.
-
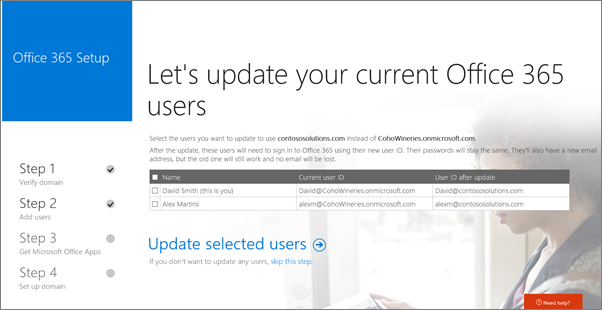
In the Office 365 setup wizard, after you've verified your domain ownership, you update the email addresses (which are also the user IDs) for yourself and other people you've already added. You'll switch from the initial partner.onmschina.cn domain to use your custom domain instead for sign-in and email.
-
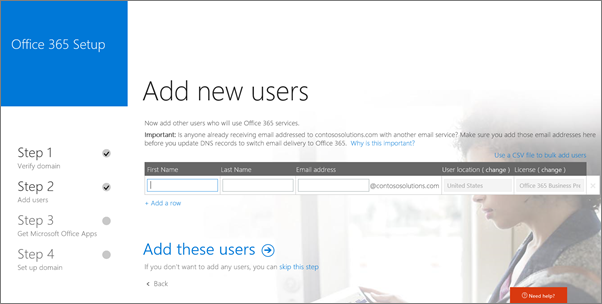
You'll also be prompted to add to Office 365 anyone who has an email address at your domain. Make sure you add them, so people don't lose any messages when you switch your email to Office 365!
Step 3: Set up email and other Office 365 services with your domain
The final step is to set up your Office 365 services, including switching email for your domain to Office 365. To finish, you have to update some records at your DNS host or domain registrar. The setup wizard tells you exactly which records to update, including the values you'll need for each one, and guides you through the steps.
When you're done, email for your domain will start coming to Office 365 and your other Office 365 services, like Skype for Business Online, will also be set up.
Now you're guided to do one of the following:
-
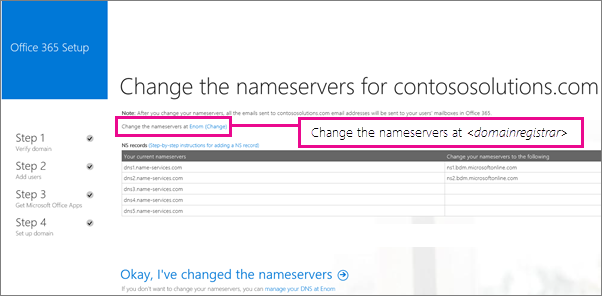
Let Office 365 set up your DNS records for you (simplest). Change your domain's nameserver (NS) records at your domain registrar to point to Office 365 nameservers. This is a good option unless you already have a website that you're using with your domain.
The setup wizard typically detects your registrar and gives you a link to step-by-step instructions for updating your NS records at the registrar website. Or you can Change nameservers to set up Office 365 with any domain registrar. Then Office 365 can automatically set up email and other services for you.
This changes your domain's DNS hosting to Office 365 (not recommended if you have a website with your domain, like www.contoso.com).
—OR—
-
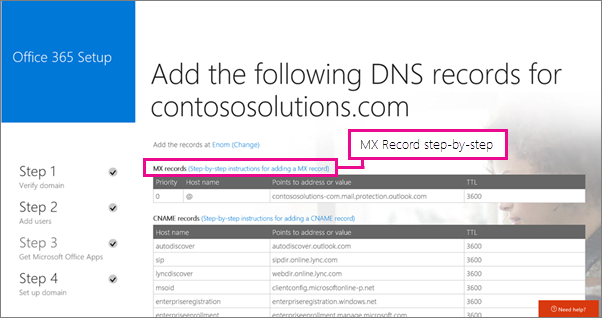
Edit your domain's DNS records for Office 365 yourself. Go to your DNS host website and set up the records yourself, including the MX record for email. The setup wizard typically detects your DNS host and gives you a link to step-by-step instructions for updating records at their website, including screenshots and the exact values to add. Or you can follow these steps..
Learn more about setting up your domain with Office 365
The setup wizard walks you through each step for setting up Office 365, but here are a few additional pointers if you want to learn more.
-
Check out this list of what you should have on hand before you get started to make sure you're prepared before you step through the setup wizard.
-
If you'd rather keep using the domain you got when you signed up for Office 365, you can do that (learn more about the partner.onmschina.cn domain). You don't have to verify and set up a custom domain unless you want to use your own domain name for email in Office 365.
-
If you just want to download and use Office 365 apps, like Outlook or Word, you don't need to verify your domain. .
-
If you're just beginning to use a domain, learn about how a domain name works with Office 365 and how the setup wizard helps you get started.
No comments:
Post a Comment