With the Mail app on Windows 10, you can quickly read and respond to messages from multiple accounts, send files and pictures, and set up an automatic reply when you're away. You can access the Mail app on any Windows 10 computer or device, including phones.
For information on setting up your email accounts, see Set up email in Mail for Windows 10. If you're having problems sending or receiving messages, or you can't see some or all of your messages or calendar entries, see Where are my email messages or events?
Compose and send messages
When you create a new message, you can change fonts, add files, images, tables, and links, set the message importance, check spelling, zoom in or out, or find text within the message.
Notes:
-
You cannot set the default font or text color for all new messages. Any changes you make apply only to the message you're currently composing.
-
Mail for Windows 10 doesn't allow you to set read receipts on your outgoing messages.
Create a new message
To create a new message in Mail for Windows 10, choose New mail. If you don't see New mail, choose the + symbol.
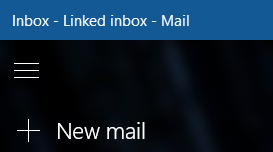

If you have use Mail for Windows 10 with multiple email addresses and you haven't linked your inboxes, choosing New mail will open a new message with whatever email account you're currently viewing.
If you have linked the inboxes from multiple email addresses, choosing New mail will display a list of your linked email addresses for you to choose from. Pick your preferred email address to open a new message.
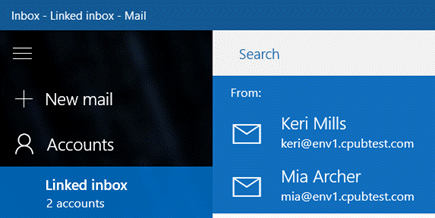
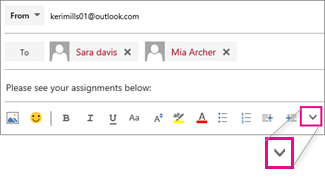
To add recipients, you can type an email address in the To field or choose the Add recipients icon  to see a list of your contacts. If you want to Cc or Bcc someone, choose the Cc & Bcc option.
When you're done composing your message, choose Send. If you decide not to keep your message, choose Discard. If you don't choose one of these options and move to another message in the message list, Mail for Windows 10 will save your new message in the Drafts folder. If you want to return to it later, just choose the Drafts folder and then pick your message from the list of drafts. Finish composing your message and then choose Send.
Change fonts, check spelling, and add images, files, tables, and links
Mail for Windows 10 supports a full range of fonts, font sizes, colors, and special formatting options. You can also insert files, pictures, links, and tables. Finally, you can check your spelling, set an importance, zoom in or out, and search within your message.
-
Change fonts and highlight text
To change your font in a new message, use the bold, italic, and underline buttons on the Format tab or use the drop-down to the right of the underline button to choose a specific font and font size, add highlighting, or change your font color.

Note: You cannot set the default font or text color for all new messages. Any changes you make apply only to the message you're currently composing.
-
Insert files, tables, pictures, and links
Use the Insert tab to add a variety of different types of content to your message.

Note: The Insert tab won't let you add tables, pictures, or links unless your cursor is in the message body. If you're still editing the To field or the message subject, these options won't be available.
Choose the Files option to add an attachment to your email message.
To insert a picture so that the recipient sees the picture in the body of the email message, choose Pictures.
Note: You can insert pictures as either files or pictures. If you choose files, the picture may not be displayed when the recipient opens the email message, however the recipient can still open the picture by double-clicking on the attached file.
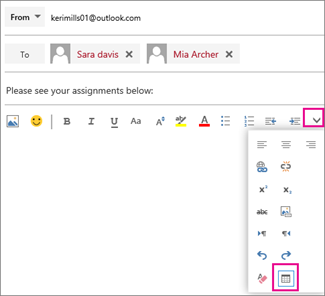
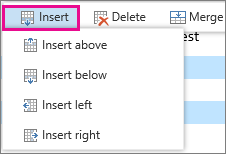
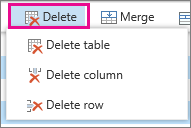
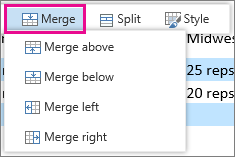
To add a table, choose Table. By default, a table with three rows and three columns is inserted in your message. You can choose Delete to delete a row or a column or Insert to insert a row or a column. Use the other buttons that appear on the toolbar to customize the look and feel of your table.
If you want to add a hyperlink to a website, choose Link. If you want to display something other than the URL or address for the link, fill out the Text to display field. Otherwise, you can leave that field blank. Once you've filled out the Address field with the URL of the link, choose Insert.
-
Check spelling, set an importance for your email, zoom, or search within your message

To check spelling, choose the Spelling button. Spell check uses your default language in Windows, but you can choose the drop-down next to Spelling to pick a different spell check language.
If your message is very important, you can choose the exclamation point. Many email programs will display high priority messages differently than those without the high priority designation. If your message is not important, for example, an FYI that your recipient doesn't need to read quickly, you can choose the down arrow to mark your message as low priority.
Do you need to search within your message for a word or phrase? Choose Find, then type the word or phrase. Every instance of the word or phrase will be highlighted.
Choose Zoom to change how your new message is displayed while you're composing it. This doesn't affect your font size in any way.
Note: Mail for Windows 10 doesn't allow you to set read receipts for your outgoing messages or create rules that automatically forward or move messages into folders.
Read and respond to messages
Once you've added an account to Mail for Windows 10, you can start using the app to read and respond to messages. All new messages appear in the message list to the left of the reading pane.
Note: You can't hide the message list or the reading pane in Mail for Windows 10.
You can reply, reply all, forward, delete, and flag an email message from the toolbar at the top of the message. If you select More  , you can take additional actions, such as marking the message as unread, moving the message to another folder, searching within the message, navigating between messages, saving the message as an .eml file, and printing the message.
Reading messages
All of your messages are displayed in the message list. When you first set up your email, your messages are grouped by conversation (subject) and the first few words of the email message are displayed in the message list below the subject. To read a message, select it in the message list and the message will open in the reading pane. You can't turn off the reading pane, move the reading pane, or open the message in a new window.
-
Mark messages as read
When you move from one message to the next in the message list, Mail for Windows 10 automatically marks the message as read. You can turn this off or choose a different behavior by choosing Settings > Reading and selecting one of the options for marking an item as read.
-
Turn off group by conversation or hide the first few words of the message
Choose Settings > Reading. Scroll down to the Conversation section and use the sliders to turn Show preview text and/or Show messages arranged by conversation either on or off. If you have multiple accounts, your choice for Show messages arranged by conversation applies only to the account shown in the Select an account drop-down.
-
Download content
If you see an X or a placeholder where an image should be or you see a notice that some content in your message wasn't downloaded, you can scroll down to the bottom of the message to choose Download messages and pictures. To change this setting for all messages so all content downloads automatically, choose Settings > Reading.Under External content, choose your account and then turn Automatically download external images and style formatson.
-
Use caret browsing
Caret browsing allows you to click in the reading pane and place your cursor anywhere on a line of text. You can then use your arrow keys to navigate up or down line by line or side to side character by character within your message. Caret browsing is turned off by default. To turn it on, choose Settings > Reading. Under Caret browsing, use the slider to turn the feature on.
Responding to messages
When you reply, reply all, or forward a message, the original message is included. You can't change this behavior, but you can select all of the text in that message and delete it.
Note: When you reply to a message, the original message is included in the reply, but any attachments are not. If you forward the message, the entire message, including attachments, is sent to the recipient.
Type your reply, add any necessary attachments, tables, pictures, or links, and then choose Send in the upper right to send your message. If you decide you don't want to send your message, choose Discard.
Flagging your messages
You can set a flag on messages you want to be able to easily find. To set a flag, choose the Set flag option in the reading pane. Choose Clear flag to remove a flag.
You can filter your message list to only show flagged items by choosing the drop-down next to All in the message list and choosing Flagged.
Working with drafts
If you don't send or discard your message, it's automatically saved in your Drafts folder. To return to your draft, select the Drafts folder, then select your message. When you're done editing your message, choose Send.
If your inbox shows messages by conversation, any draft replies and forwards will also show up in your inbox grouped with the original message. If you turn off arrange by conversation, these drafts will only be visible in the Drafts folder.
Handling junk
Junk email, or spam, is a common problem. If you receive an email message that's obviously junk mail, you can right-click the message in the message list and choose Move to Junk. This removes the message from your inbox and sends it to a Junk folder. You can only choose one message at a time to move to junk.
Tip: Not all email accounts support Move to Junk.
Customizing your view
Mail for Windows 10 doesn't support moving, hiding, or resizing the reading pane or the message list. You can expand or collapse the folder pane by choosing 
If you collapse the folder pane, you can create a new message by choosing the + symbol.
My emails take too long to arrive or I can't find older messages
Mail for Windows 10 checks for email at regular intervals. If you want to check for mail more frequently or access older messages, you can change your sync settings.
-
Choose Settings  > Manage Accounts, and select the account you want to change.
-
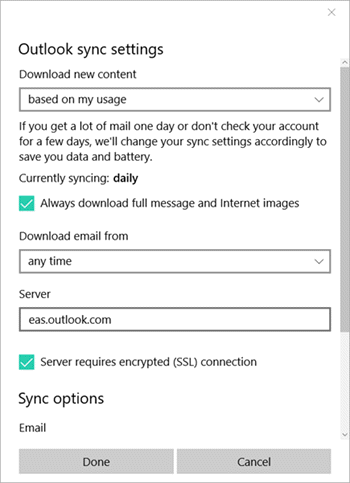
Choose Change Mailbox sync settings.
-
To check for new messages more frequently, under Download new content, select the interval that's right for you.
Note: The default setting is based on my usage, which takes into account the number of messages you receive, your internet connection, and your battery life.
-
To see older messages, under Download email from, choose any time.


 to expand the gallery.

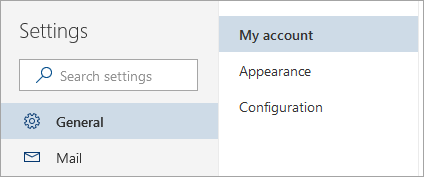
 > View full settings.


 . A details page appears with sharing options.


 to see a list of your contacts. If you want to Cc or Bcc someone, choose the Cc & Bcc option.


 , you can take additional actions, such as marking the message as unread, moving the message to another folder, searching within the message, navigating between messages, saving the message as an .eml file, and printing the message.
 > Manage Accounts, and select the account you want to change.
