You can insert most types of image files into a Visio diagram. They appear as normal pictures but don't have some features that Visio shapes have, like connection points (although you can still connect them to other shapes by using a connector).
-
On the Insert tab, in the Illustrations group, click Pictures or Online Pictures.
When using pictures or clip art from Bing, you're responsible for respecting copyright, and the license filter in Bing can help you choose which images to use.
-
Locate the picture you want to insert, click the picture file, and then click Open (if the picture is on your PC) or Insert (if the picture is online).
Some files that you import into Visio drawings as graphic images appear as metafiles. However, bitmap files, such as .bmp, .jpg, .pcx, and so on, remain bitmaps in the Visio drawing.
You can find and insert a picture from your local device or an online source. For example, you can add an official company logo in a local folder to a network diagram, or search for a picture on the web to add color and interest to a business roadmap diagram. A variety of file formats are supported. Each picture can be up to 6 MB in size.

Add a picture from your device
-
Open the diagram for editing.
-
On the ribbon, select Insert > Pictures
 .
. -
In the Insert File dialog box, click Choose File, locate a picture, and then select Open.
The picture is added to the diagram. You can drag it to another location.
Add a picture from the Web
-
Open the diagram for editing.
-
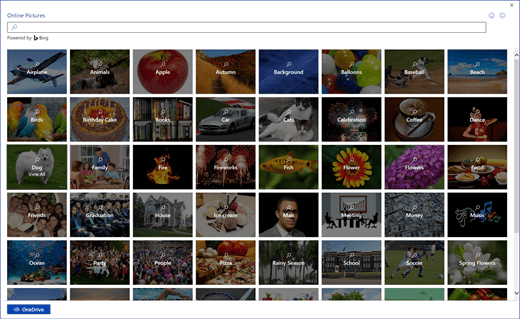
On the ribbon, select Insert > Online Pictures
 .
.When using pictures or clip art from Bing, you're responsible for respecting copyright, and the license filter in Bing can help you choose which images to use.
-
In the Bing search window, enter a search term to locate a picture, or click a category to browse.
-
Select the picture you want, and then select Insert.
The picture is added to the diagram. You can drag it to another location.
Modify a picture
Once a picture is inserted, you can make necessary adjustments.
-
Open the diagram for editing.
-
Select the picture.
-
Do one or more of the following:
-
Move, resize, cut, copy, and paste the picture in the same way as a shape. For more information, see Select, copy, and move shapes in Visio for the web.
-
To change the size, drag one of the selection handles that appear on the sides and corners. For more information, see Change the size, rotation, and order of a shape in Visio for the web.

-
You can add a border to the picture. First, ensure the picture is selected. Then, on the Picture tab of the ribbon, choose the downward pointing arrow next to Shape Outline
 and then select a color and a line weight or style.
 -
To rotate the picture, select Picture > Rotate
 , and then select Rotate Right 90° or Rotate Left 90°. You can also drag the Rotation handle
  on the picture in in the direction you want to rotate the image.
 -
To send the picture forward or backward, select the Picture tab and then select Forward or Backward
 , and then select one of the Bring ... or Send ... options.
 -
To add alternative text to the picture, select the picture and then select Picture > Alt Text
 .
.
-
Insert a picture from a graphics file
-
On the Insert menu, point to Picture, and then click From File.
-
Locate the folder that contains the picture you want to insert, click the picture file, and then click Open.
Tip: You can also open graphics files from the File menu. On the File menu, click Open. In the Files of type list, click the graphics file format you want, and then locate the file. Click Open. Most files that you import into Visio drawings as graphic images appear as metafiles. However, bitmap files, such as .dib, .bmp, .pcx, and so on, remain bitmaps in the Visio drawing.
Insert a picture directly from a scanner or digital camera
-
Set up the picture in the scanner or digital camera.
-
On the Insert menu, point to Picture, and then click From Scanner or Camera.
-
If you have more than one scanner or camera attached to your computer, under Device select the one you want to use.
-
Do one of the following:
-
If you're using a scanner and want to use default settings to scan your picture, click Web Quality (for on-screen drawings) or Print Quality (for printed drawings), and then click Insert.
Note: The Insert button might be unavailable with some scanners because the scanner software doesn't support automatic scanning. In these cases, use the Custom Insert button instead.
-
If you're using a digital camera or if you want to change scanner settings, click Custom Insert. Follow the instructions for the camera or scanner you're using.
-
No comments:
Post a Comment