Prepare your Excel data source for a Word mail merge
An essential step in a Word mail merge process is setting up and preparing a data source. You can use an existing Excel data source or build a new one by importing a tab-delimited (.txt) or comma-separated value (.csv) file. After you've set up and prepared your data source, you can perform a mail merge by using Dynamic Data Exchange (DDE) with the Step-by-Step Mail Merge Wizard or by using a manual mail merge method.
Step 1: Set up and prepare your data source in Excel
If you're not using an existing Excel data source for your mail merge, you can use a contact list or an address book in a .txt or .csv file. The Text Import Wizard guides you through the steps to get data that's in a .txt or .csv file into Excel.
-
Open Excel.
-
On the Data tab, choose From Text/CSV.
-
Choose the .txt or .csv file you want, and then choose Import.
-
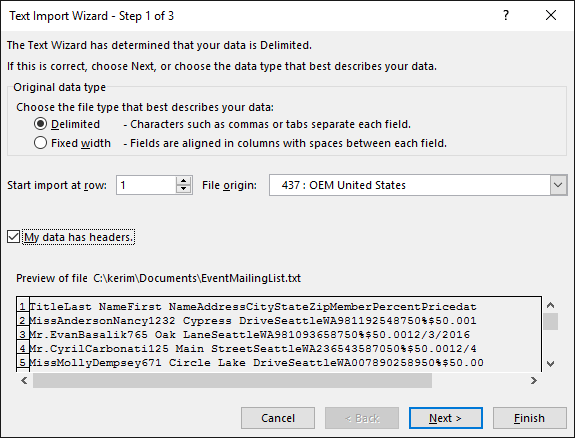
In the Text Import Wizard, in the Original data type pane, choose Delimited.
-
Select the My data has headers check box above the Preview pane if the file you're importing has headers, and then choose Next.
-
In the Delimiters pane, select the check box that matches the delimiter (such as a Tab or Comma) your data uses, and then choose Next.

Tip: The Data preview pane shows what the results will look like in a table format.
-
Under Data preview, choose the column that contains ZIP Codes or postal codes, and under Column data format, choose Text.

Notes:
-
The available formats are General, Text, and Date. Each time you apply a data format to a column, the name of the format appears in the table header for that column.
-
A column that contains numerical data such as a percentage or a currency value, for example, can only be formatted after the file is imported. See the "Format numerical data in Excel" subsection that follows for more information.
-
-
Repeat step 7 as necessary, choosing the column you want to change and the data format you want to apply.
-
Choose Finish.
-
In the Import Data dialog box, accept the default setting of Existing worksheet and the cell address, and then choose OK.
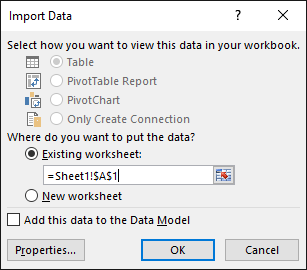
Caution: The cell address in the Import Data dialog box shows the currently selected cell. Data is imported beginning with the named cell address.
-
When done, save your data source with a new file name.
Format numerical data in Excel
Format any numerical data like percentages or currency values in any new or existing data source in Excel that you intend to use in a Word mail merge. To preserve numeric data you've formatted as a percentage or as currency during a mail merge, follow the instructions in the "Step 2: Use Dynamic Data Exchange (DDE) for a mail merge" section.
In your Excel data source that you'll use for a mailing list in a Word mail merge, make sure you format columns of numeric data correctly. Format a column with numbers, for example, to match a specific category such as currency.
-
Open your Excel data source.
-
Choose a column that you want to format.
-
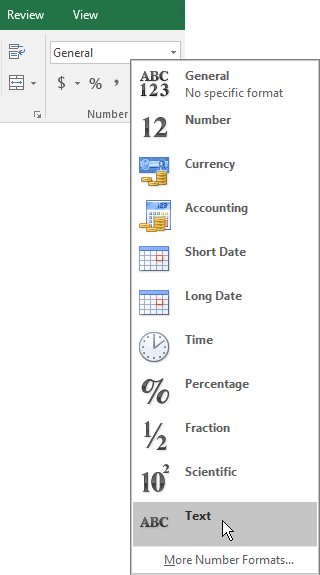
On the Home tab, in the Number group, choose the Number Format (General) box down arrow, and then choose an option in the list.
-
Repeat steps 2 and 3 as necessary.
-
When done, choose Save.
Step 2: Use Dynamic Data Exchange (DDE) for a mail merge
When you have an Excel data source that contains formatted numbers like percentages and currency values, some of the numeric data may not retain its formatting during a mail merge. You'll get the mail merge results you want and can preserve the format of your numeric data in Excel by using DDE.

Note: If you decide not to use DDE, follow the guidance in Use mail merge to send bulk email messages.
-
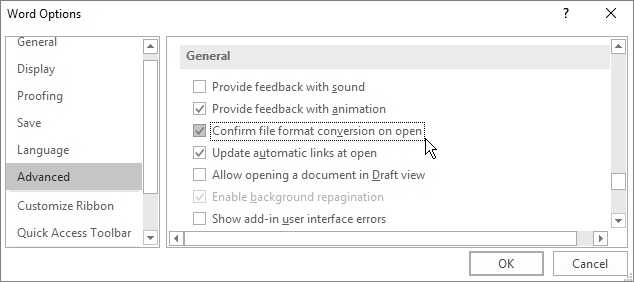
Open Word, choose File > Options > Advanced.
-
Under General, select the Confirm file format conversion on open check box.
-
Choose OK.
-
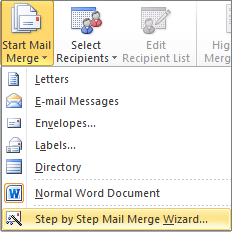
On the Mailings tab, choose Start Mail Merge > Step by Step Mail Merge Wizard.
-
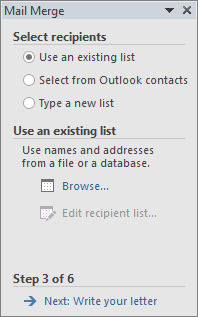
In the Mail Merge pane, under Select recipients, choose Use an existing list.
-
Under Use an existing list, choose Browse, and then open your formatted spreadsheet.
-
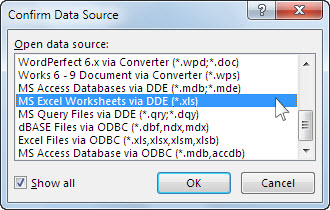
In the Confirm Data Source dialog box, select the Show all check box, and choose MS Excel Worksheets via DDE (*.xls) > OK.
-
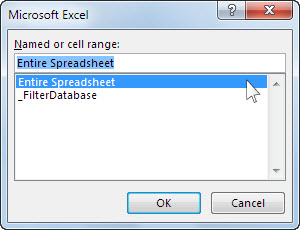
In the Microsoft Excel dialog box, choose Entire Spreadsheet > OK.
-
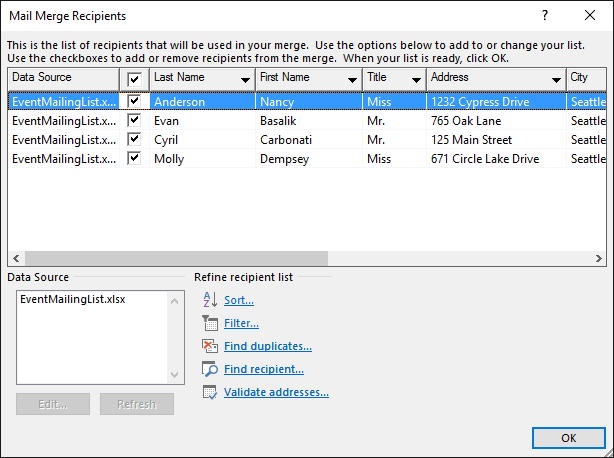
When the Mail Merge Recipients dialog box opens, choose OK.
-
Continue with your letter, email message, label, or envelope merge.
Tip: You can prevent being prompted by Word every time you open a data file. After you connect to your mailing list, go to File > Options > Advanced. Under General, clear the Confirm file format conversion on open check box.
No comments:
Post a Comment