Install Skype for Business for iOS devices with Office 365 operated by 21Vianet
The Skype for Business for iOS app brings Skype for Business presence, instant messaging (IM), and voice and video calling to your mobile device.
Important: To use Skype for Business for iOS you need a Skype for Business or Lync account—typically the same user name and password you use when signing in at work or school. If you're already using the desktop version of Skype for Business, then you have a Skype for Business account.
Install Skype for Business for iOS
-
From your phone, click the
 to go to the App Store and search for Skype for Business.
 -
Tap Get >Install.
Sign in to Skype for Business for the first time
-
On your iOS device, swipe each page of apps until you see the Skype for Business icon.

-
Tap the Skype for Business icon to open the app.
-
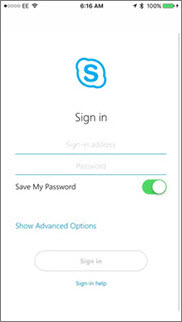
Enter your sign-in address (for example, user@domain.com) and password, and then tap Sign In.
You might be asked for both a user name and a sign-in address. The user name is what you use to sign in to your organization's network, either user@domain.com or domain\username.

-
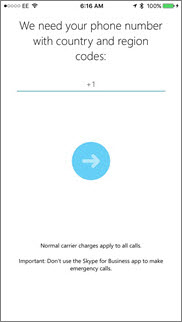
Enter your mobile number with country and region codes. If you're an enterprise voice customer and Skype for Business can't use a Wi-Fi or cellular data network to make an audio or video call, you'll be called at this number and connected to the audio portion of the call.

-
Tap Next.
-
If applicable, choose whether to sign up for the Customer Experience Improvement Program and click Next.
-
Accept the licensing agreement, and then click Done.
Sign out of Skype for Business
Tap your picture, and then Sign out.
Remove Skype for Business
To remove Skype for Business from your iOS device, tap and hold the Skype for Business icon until it shakes. Tap the "x" and then Delete.
No comments:
Post a Comment