Edit query step settings (Power Query)
Note: Power Query is known as Get & Transform in Excel 2016. Information provided here applies to both. To learn more, see Get & Transform in Excel 2016.
Note: For a quick video on how to display Query Editor, see the end of this article.
Whenever you add a query step in Power Query, it's inserted into the sequence of steps that follows the selected step. If you add a step anywhere other than at the end of the flow, you should verify that all the subsequent steps function properly.
Note: When you insert or delete an intermediate step in a query you might potentially break a query. Power Query will display an Insert Step warning when you try to insert a new step.
I want to
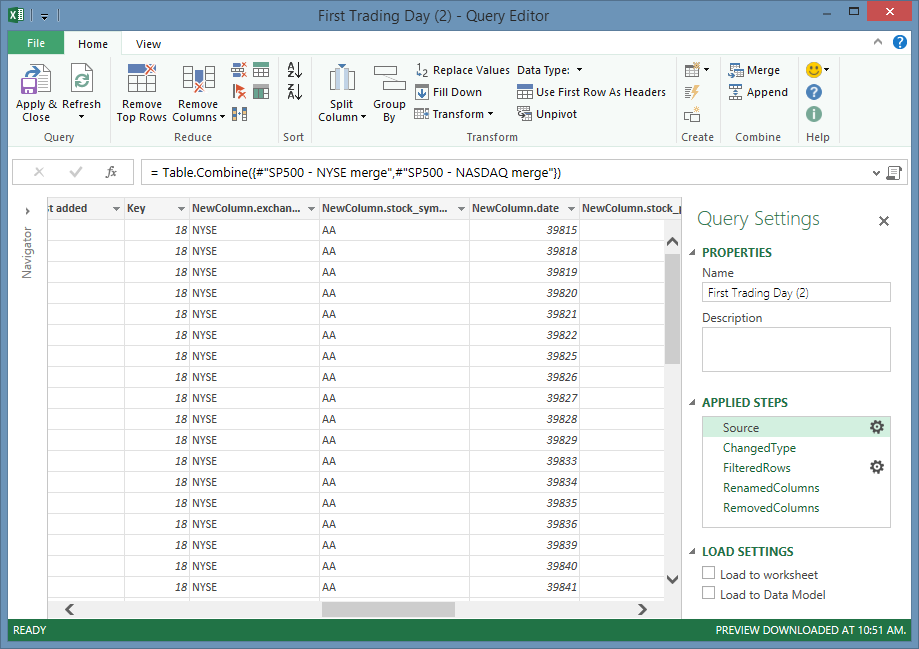
The following image shows the Query Editor, with the Query Settings pane on the right side of the window. Query Editor is where Power Query queries are created, edited, and refined.

Add a query step
There are two ways to add a query step to your query.
Use Query Settings
-
In the Query Settings pane, in the APPLIED STEPS list, click a query step.
-
After you complete a query step that reshapes your data, a query step is added below the selected query step. For more information about how reshape your data, see Shape data.
Use a formula
-
If needed, in the Steps pane, click a query step. The query step is added below the selected query step.
-
Click the formula icon (
 )to the left of the formula bar.
A new formula is created in the form = <nameOfTheStepToReference> -
Type in the new formula as = Class.Function(ReferenceStep[,otherparameters]).
For example: You have a table with the column Gender and you want to add a column with the value "Ms." or "Mr.", depending on the person's gender. The formula would be = Table.AddColumn(<ReferencedStep>, "Prefix", each if [Gender] = "F" then "Ms." else "Mr.")

Note: When you add a query step, an error might occur in subsequent steps. An error is produced if the new step alters fields, such as column names, that are used in any of the steps that follow the inserted step.
Edit a step
There are two ways to edit an existing step.
Use Query Settings
-
In the APPLIED STEPS list, click the step you want to edit.
-
Click the gear (
 ) icon or right click, and click Edit Settings.
 -
In the dialog box for the selected step, edit the query step values.
-
Click OK.
Use the formula bar
-
In the APPLIED STEPS list, click the step you want to edit.
-
In the formula bar, change the values in the formula as needed. For more information about Power Query formulas, see Learn about Power Query Formulas.
-
In the Query Editor dialog, click Refresh.
Delete a step
-
Click the (
 ) icon to the left of the step you want deleted or
 -
Right click the step, and click Delete or Delete Until End.
Reorder a step
You may move a step up or down in the Steps pane. Changing a step's position in the Steps pane can make one or more steps fail. Be sure to verify that all steps are working properly after you finish the reorder.
To move a step up or down the list of steps in the Steps pane
-
In the Steps pane, right click the step you want to move.
-
From the context menu, click either Move Up or Move Down to move the selected step one position up or down the list.
Note: To move a step multiple positions, repeat these steps. When a step is at the top or bottom of the list one of the move options is grayed out.
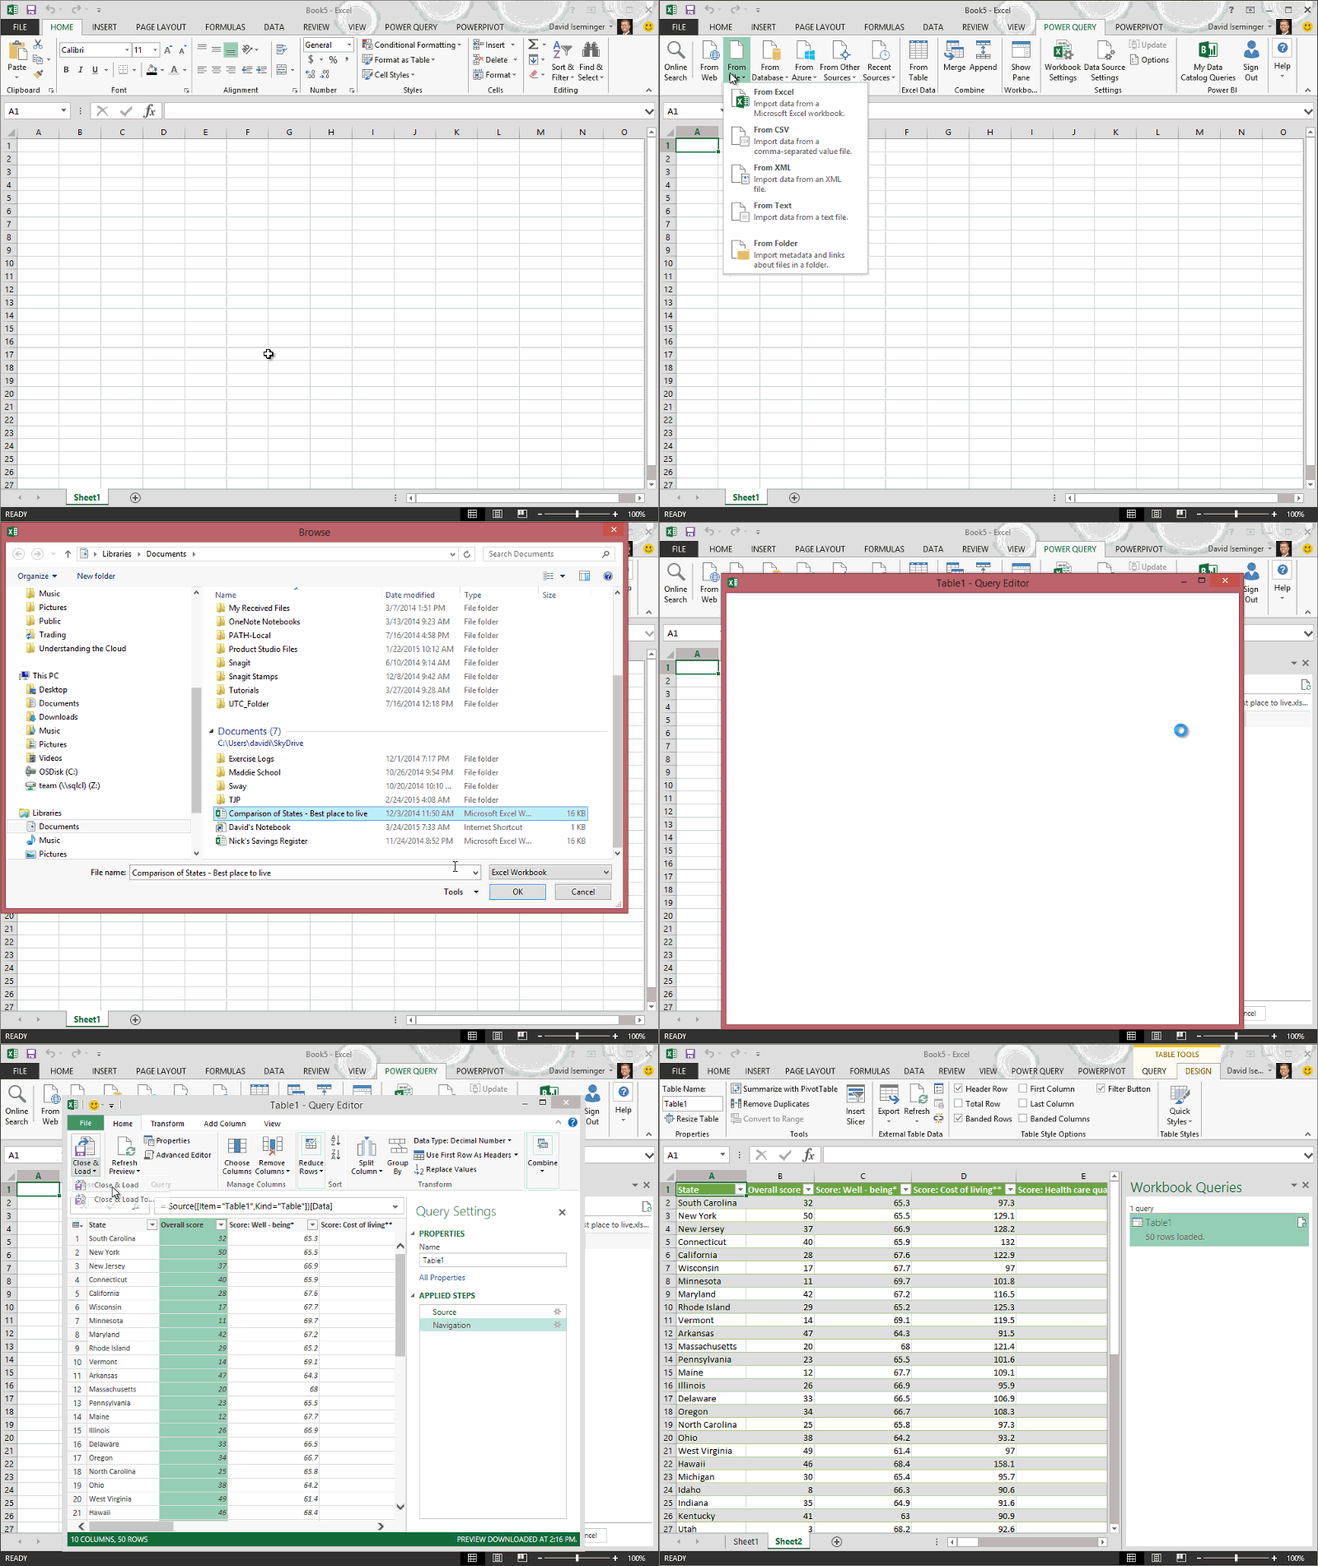
Note: The Query Editor only appears when you load, edit, or create a new query using Power Query. The following video shows the Query Editor window appearing after editing a query from an Excel workbook. To view the Query Editor without loading or editing an existing workbook query, from the Get External Data section in the Power Query ribbon tab, select From Other Sources > Blank Query. The following video shows one way to display the Query Editor.

No comments:
Post a Comment