Tip: Learn more about Microsoft Forms or get started right away and create a survey, quiz, or poll. Want more advanced branding, question types, and data analysis? Try Dynamics 365 Customer Voice.
Note: Are you creating a survey, poll, or other type of form? Start here.
As an educator, you can use Microsoft Forms to quickly assess student progress and get real-time feedback through the use of quizzes that you design and share with your class.

Microsoft Forms also includes rich, real-time analytics that provide summary information as well as results for individual students. You can export the quiz results to Microsoft Excel for more in-depth analysis.
Start a new quiz
-
Sign in to Microsoft Forms with your Microsoft 365 school or work account.
-
Select the drop-down arrow next to
 New Form, and then select New quiz.
 -
Enter a name for your quiz and, if you want, a description for it.
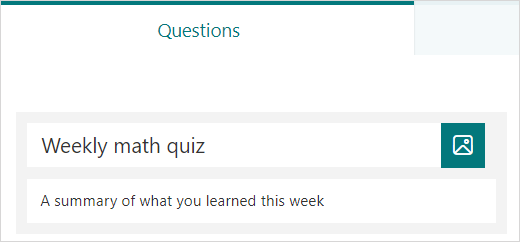
Note: Quiz titles can contain up to 90 characters. Descriptions can have up to 1,000 characters.
Note: Your quiz is saved automatically while you create it.
Add questions
-
Select
 Add new to add a new question to your quiz.
 -
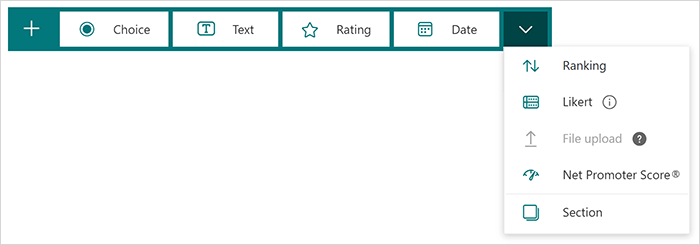
Choose what kind of question you want to add, such as Choice, Text, Rating, or Date questions. Select More question types
 for Ranking, Likert, File upload, or Net Promoter Score® question types. To organize sections for your questions, select Section.
Tip: You can also format your text. Highlight a word or words in your title or questions, and then choose any of the following: Bold (keyboard shortcut - CTRL/Cmd+B), Italic (keyboard shortcut - CTRL/Cmd+I), Underline (keyboard shortcut - CTRL/Cmd+U), Font color, Font size, Numbering, or Bullets.
-
Using the Choice question type as an example, add your question and answers. Select
 Add option to add more answer options.
Tip: Select More settings for question
 > Subtitle to add a subtitle to the question.
 -
Select the Correct Answer check mark next to the correct answer or answers.
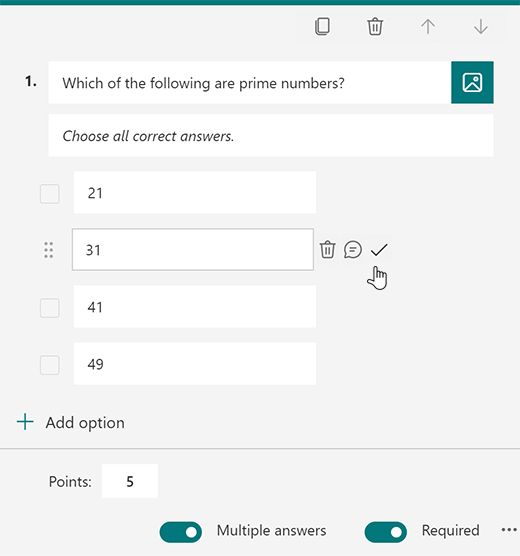
To remove an answer, select the trash can button next to it. You can also choose to make a question required or allow multiple choices for a question by changing the settings at the bottom of the question. -
Add a number in the Points text box to assign a point value for a correct answer to the quiz question.
-
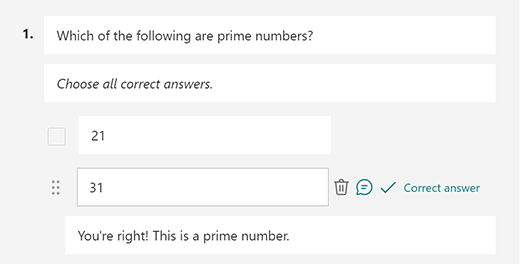
Select the Message icon next to any answer if you want to customize a message for it. Respondents will see the message when they've selected that answer.
-
To display math formulas, select More settings for question
 > Math.
 -
Select Enter an equation to trigger various math symbols and formula options to use in your quiz.
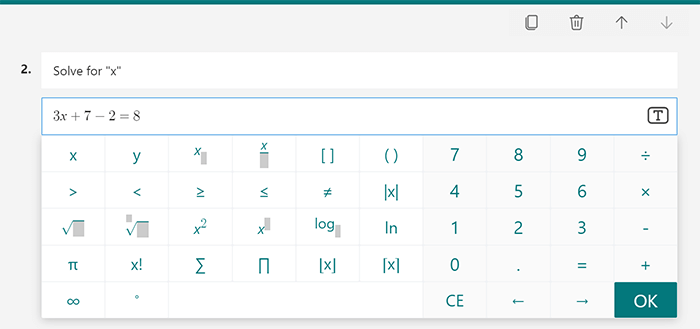
Tip: Select the Copy question icon in the upper right corner of a question to duplicate it. To change the order of the questions, click or tap the Up or Down arrows on the right side of each question.
Preview your quiz
-
Select Preview to see how your quiz will look on a Computer or Mobile device.
-
To test out your quiz, answer the questions in Preview mode, and the select Submit.
-
To keep editing your quiz, select Back.
Start a new quiz
-
Sign in to Microsoft 365 with your school account.
Note: This feature only applies to Class or Staff Notebooks for Office 365 Education users. Learn more about OneNote Class Notebook and OneNote Staff Notebook.
-
Open the OneNote notebook in which you want to insert a quiz.
-
On the Insert tab, select Forms.
Note: The Forms button is only available for Office 365 Education users. To access Forms in OneNote for the web, please sign in with your school account.
-
A Forms for OneNote panel will open and dock on the right side of your OneNote notebook.
-
Under My Forms, select
 New Quiz.
 -
A new tab for Microsoft Forms will open in your web browser.
-
Select the placeholder default title and update it with your own. If you want, also add a description.

Note: Quiz titles can have up to 90 characters. Descriptions can have up to 1,000 characters.
Note: Your quiz is saved automatically while you create it.
Add questions
-
Select
 Add new to add a new question to your quiz.
 -
Choose what kind of question you want to add, such as Choice, Text, Rating, or Date question types. Select More question types
 for Ranking, Likert, File upload, or Net Promoter Score® question types. To organize sections for your questions, select Section.
Tip: You can also format your text. Highlight a word or words in your title or questions, and then choose any of the following: Bold (keyboard shortcut - CTRL/Cmd+B), Italic (keyboard shortcut - CTRL/Cmd+I), Underline (keyboard shortcut - CTRL/Cmd+U), Font color, Font size, Numbering, or Bullets.
Preview your quiz
-
Select Preview to see how your quiz will look on a Computer or Mobile device.
-
To test out your quiz, answer the questions in Preview mode, and then select Submit.
-
To keep editing your quiz, select Back.
Your newly created quiz will appear at the top of your My forms list in the Forms for OneNote panel and can be embedded into your OneNote notebook. Learn more.
Start a new quiz
-
Sign in to Microsoft Forms with your Microsoft 365 school or work account.
-
Select
 New quiz.
 -
Enter a name for your quiz and, if you want, a description for it.
Note: Your quiz is saved automatically while you create it.
Add questions
-
Select
 Add new to add a new question to your quiz.
 -
Choose what kind of question you want to add, such as Choice, Text, Rating, or Date questions.
Tip: You can also format your text. Highlight a word or words in your title or questions, and then choose any of the following: Bold, Italic, or Underline.
-
Using the Choice question type as an example, add your question and answers. Select
 Add option to add more answer options.
Tip: Select More settings for question
 > Subtitle to add a subtitle to the question.
 -
Select the Correct Answer check mark next to the correct answer or answers.
To remove an answer, select the trash can button next to it. You can also choose to make a question required or allow multiple choices for a question by changing the settings at the bottom of the question. -
Add a number in the Points text box to assign a point value for a correct answer to the quiz question.
-
Select the Message icon next to any answer if you want to customize a message for it. Respondents will see the message when they've selected that answer.
-
To display math formulas, select More settings for question
 > Math.
 -
Select Enter an equation to trigger various math symbols and formula options to use in your quiz.
Tip: Select the Copy question icon in the upper right corner of a question to duplicate it. To change the order of the questions, click or tap the Up or Down arrows on the right side of each question.
More resources
Now that you have the basics down, you can also customize your form theme, add a picture to a question, create sections, use branching logic, and more.
Feedback for Microsoft Forms
We want to hear from you! To send feedback about Microsoft Forms, go to the upper right corner of your form and select More form settings  > Feedback.
See Also
Send your quiz to your students
Microsoft Forms introductory course: Creating Authentic Assessments
No comments:
Post a Comment