Note: This is legacy content for older versions of Windows Phone. If your device is running Windows 10, see Office Lens for Windows.
Office Lens is a great way to capture notes and info from whiteboards, menus, signs, handwritten memos, or anything with a lot of text. You don't need to jot down notes, rely on blurry pictures, or worry about misplacing your notes. It's great for capturing sketches, drawings, and equations too, and even images without text.
Office Lens gets rid of shadows and odd angles so images are easier to read. You can download Office Lens for free from the Windows Phone 8 Store.
When you save pictures to your phone's camera roll they're also sent to OneNote, an online notebook, where you can find them quickly.
If you're using OneNote on a Windows PC, you can even copy text from your pictures. You can search for printed text in images too, so you can find what you're looking for.
You can also convert document and whiteboard images to Word and PowerPoint files that you can edit.
When you install Office Lens, you'll be prompted to sign in with your Microsoft Account. Being signed in makes it possible for Office Lens to send your pictures to OneNote.
Choose a mode
As soon as you open Office Lens, you can choose your mode — photo, business card, whiteboard, or document — so Office Lens can make the image look its best.
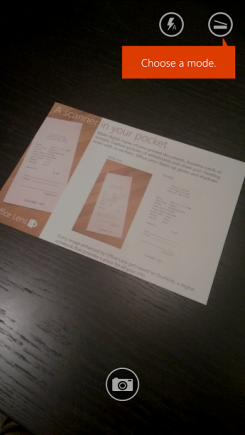
Photo This is a good mode to use if you're taking pictures of scenery or people.
Business Card Use this mode to capture business cards. Office Lens will automatically extract the contact information from the card so it is easier to read and import into your contact list.
Whiteboard Use this mode to capture notes. Office Lens will adjust images so the background isn't too bright and the words are easier to read. It's an ideal setting for blackboards and sketches too.
Document This mode will help you get the most out of small words and details on a page. It's great for things like posters and restaurant menus.
Take a picture
Choose whether or not to use a flash, and choose other options like the photo resolution. To capture the item precisely, make sure the frame outlines it, and then use the Camera button to take your picture. You can take more than one picture, save them as a set, and send them to OneNote all at the same time.
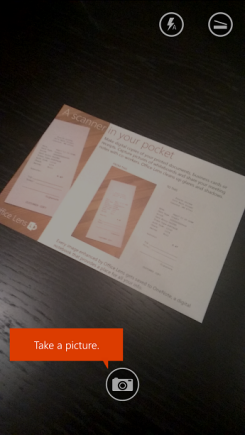
To see the photos you've recently taken, swipe back.
Review and edit
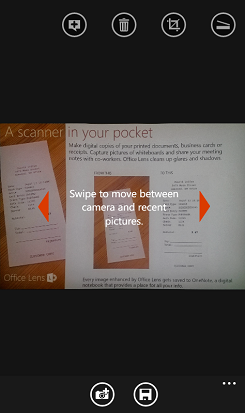
Get your images picture perfect by cropping, rotating them, or adding captions. You can change the mode at this step too, if you need to.
-
Swipe left and right to see the photos you've recently taken.
-
Add more photos by swiping to the end of the live camera or by tapping the Add photo button.
Tip: To edit existing photos from your camera roll, tap ... > import and choose a photo from one of your albums.
-
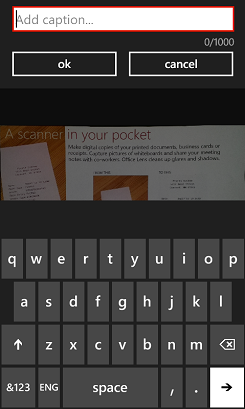
Tap the Caption button if you want to add a description of your photo.
-
When you're done, tap the Save button.
-
On the Save screen, you can change the title of your photo or set of photos. The title you use here will also be the title of the page in OneNote where your photos will be saved.
-
If you'd like to create a Word or PowerPoint file containing your photos, select the check boxes and click the check mark button.
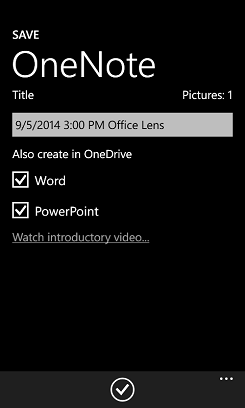
By default, photos saved to OneNote will be in your main notebook, but you can change the location to keep your notes organized in a way that suits you.
Note: If you're new to OneNote, you'll find your photos in the Quick Notes section of <Your First Name's> Notebook. If you've been using OneNote for a while, your notebook will have a different name, like Personal, Personal (web), or My Notebook, and your captured content will be in the Unfiled Notes section.
Additional information
Photos saved as Word or PowerPoint files, or as PDFs will be in your Documents folder in OneDrive, so you can access them from any of your devices. Office Lens doesn't just take a picture and import an image into a Word or PowerPoint file. The final Word and PowerPoint documents are real Office documents.
-
For Word, Office Lens recognizes the text, handwritten or printed, and the document layout. All the text, formatting, and layout in the Word document it creates is fully editable--just like you authored it at your desk.
-
For PowerPoint, all the handwritten lines and strokes are transformed into PowerPoint drawing objects that can be recolored, resized, moved around, and edited. You can remove the background of drawings as well, which makes it easier to reuse the drawings in other presentations.
-
For PDFs, Office Lens extracts the text information. You can search the content in a file with the text and you can highlight or copy part of the page with your PDF reader app.
You can see how it works in the following video.

Accessibility
In addition to the ability to add captions to your Office Lens photos, Windows Phone has accessibility settings that can help you use Office Lens in a way that works for you.
-
In the App list on your Windows Phone 8, tap Settings > ease of access.
Here are a couple of settings that you might find helpful:
Screen Magnifier When the screen magnifier is on, you can double-tap with two fingers to make text on your phone screen bigger.
High Contrast High contrast helps makes things on your screen easier to read by changing the icons and text to black and white and showing a solid background behind words that would otherwise be on top of pictures.
You can find out more about the Windows Phone Ease of Access settings on the Windows Phone website.
Still have questions?
Please visit the Microsoft Community forum and search for user posts about Office Lens, or get live help with Answer Desk.
No comments:
Post a Comment