If you're looking to customize your experience when saving a new file via CTRL+S or pressing the Save button in the Quick Access Toolbar, here are some options to meet your needs.
Usually use the cloud, but sometimes need to save locally?
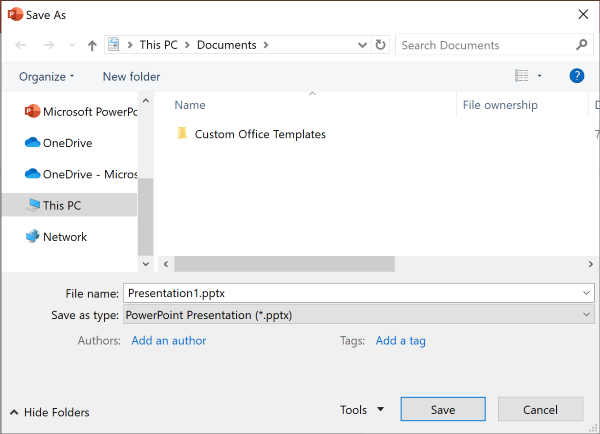
When you want to save locally use Save As instead, which, as before, triggers the legacy save dialog. You can easily add Save As to the Quick Access Toolbar (QAT) or use the F12 keyboard shortcut.
Don't use the cloud, but usually save to one location?
If you don't save your files to the cloud, and want to save to a default location on your local device, continue using the new dialog with a default local location.
From the location dropdown, you can set any recent location as your default location by right-clicking on that location or by pressing the application key on any of the locations shown. 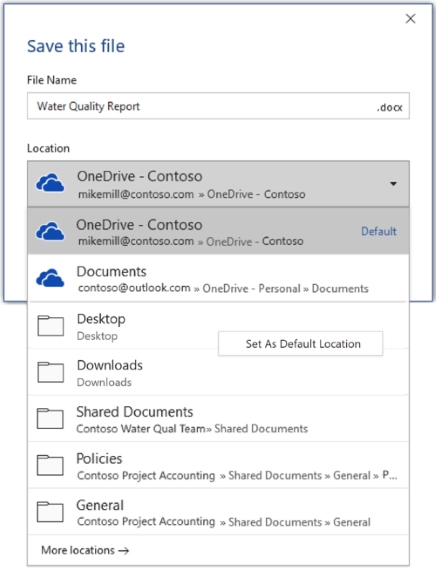
Or, via File > Options > Save, you can check "Save to Computer by default" and set "Default local file location" to the desired location. 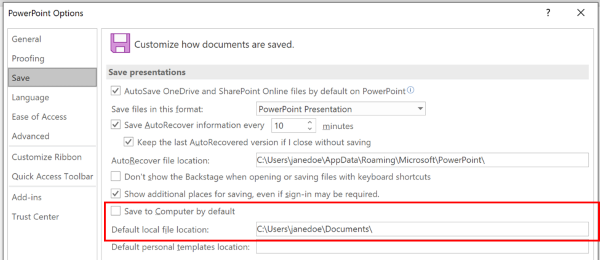
Prefer a more classic folder browsing experience, like in Windows Explorer?
Use the classic Save dialog instead.
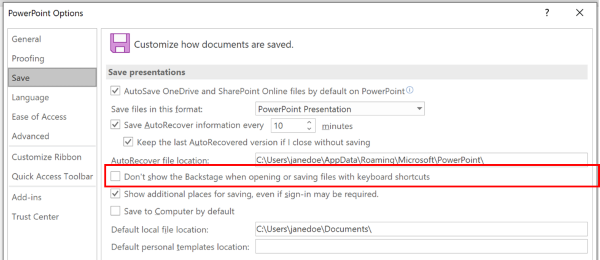
Via File > Options > Save, check "Don't show the Backstage when opening or saving files with keyboard shortcuts".
Want to use the Backstage to immediately browse all your folders or access different connected sites?
Go to the Backstage by clicking on File > Save.
Set a default working folder
The Documents folder is the default working folder for all of the files that you create in your Microsoft Office programs. You can choose a different default working folder.

The folder that you select applies only to the program that you are currently using. For example, if you change the default working folder for Word, the default working folder for PowerPoint is still Documents.
Excel, PowerPoint, Project, and Word
-
Click the File tab, and then click Options.
-
Click Save.
-
In the first section, type the path in the Default local file location box or
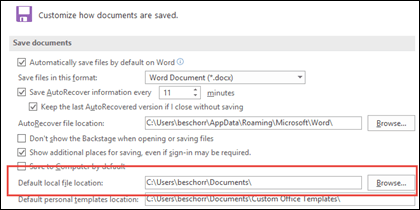
Note: In Word you can also click Browse to navigate to the folder you want to use.
Select a heading below for more information about that application
Access
-
Click the File tab, and then click Options.
-
Click General.
-
Under Creating databases, in the Default database folder box, click Browse and navigate to the default database folder you want, or type the path of the folder where you want to store Access database files.
InfoPath
-
Click the File tab, and then click Options.
-
Click General, and then, under InfoPath Options, click More Options.
-
Click the Design tab.
-
At the Project location for Visual Basic and C# code: field, Browse to the new default folder and click Open.
-
Click OK to save your changes.
Visio
When you set a default working folder in Visio, the folder that you designate for a particular type of file is the first place that Visio searches for any file of that type. If Visio fails to find a specific file in the designated folder, it searches in the My Documents folder for drawings and templates and in the My Documents\My Shapes folder for stencils. It searches in the Documents and Settings\user name folder for add-ins.
-
Click the File tab, and then click Options.
-
Click Advanced, and then, under General, click File Locations…
-
For each file type that you want to set a default folder for, click the appropriate Browse
 button, and then browse to the folder where you want to store that file type. You can have separate storage folders for each of the following types of files:
-
My Shapes
-
Drawings
-
Templates
-
Stencils
-
Help
-
Add-ons
-
Start-up
-
-
Click OK twice.
Note: You can add more than one folder for each file type. If you do so, the first folder is the default working folder. If the first folder is not available (for example, a network share that may be temporarily unavailable), Visio uses the next folder in the list. Property report definitions that are saved to these locations are available in the Reports dialog box. Find links to more information about property reports in the See Also section.
No comments:
Post a Comment