The FindTime voting page is where the organizer and attendees vote on suggested meeting times.
How to vote
To vote for suggested meeting times:
-
Open the voting page:
-
Attendees: Select Select options in the FindTime invite email you received.
-
Organizers: Select the direct link to the voting page you received when you sent the invite email or login at https://findtime.microsoft.com/ and navigate to the relevant voting page.
-
-
Sign in and select your name or the name of the person you are voting for.
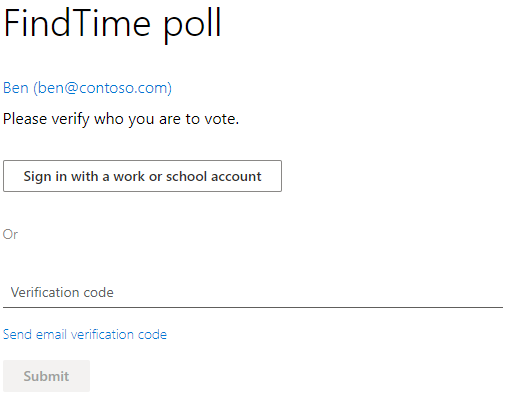
If the poll organizer elected to Require attendees to verify their identity, then you may have two options to verify your identity.
-
Sign in with your work or school account: You may sign in with your work or school Microsoft 365 account to automatically attempt verifying your identity with your selection.
Note: This option won't be present if you are already signed in to your work or school Microsoft 365 account. Additionally, you will be required to go through the manual email verification process if we can't match your account with your selection. In this case, an email containing a verification code will be sent automatically.
-
Manual email verification: Select Send email verification code, enter the code that we send you in an email, and then select Submit. If this code matches, then you will be able to proceed.
-
-
Vote for each suggested time by selecting the appropriate availability options:
-
Prefer: Your preferred meeting time.
-
Yes: You are available.
-
No: You are unavailable.
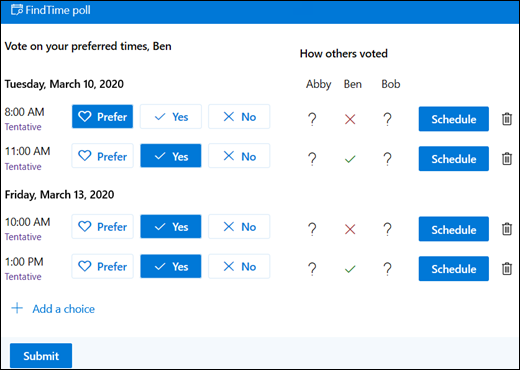
See "Understanding the voting grid" below for an explanation of all features.
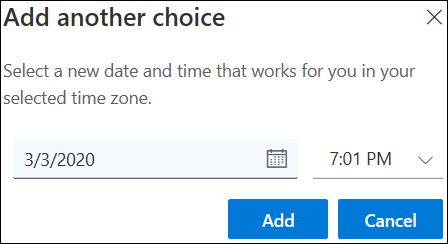
You can select Add a choice to propose a new time, if necessary. See "Suggesting new meeting times" below for more.
-
-
Select Submit.
Note: If you are signed-in, your OWA color and theme will be reflected in this voting page. Yes, we honor dark mode too!
Understanding the voting grid
The voting grid shows the current status of the voting poll.

-
Voting states: Your votes display for each meeting time. The colors of the voting blocks are:
-
Blue: If you selected the option
-
White: If you haven't selected the option
-
-
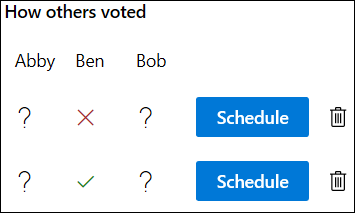
How other voted: Displays on the right.
-
A red X means the person voted no.
-
A green checkmark means the person voted yes.
-
A grey ? means the person did not make a selection.
-
-
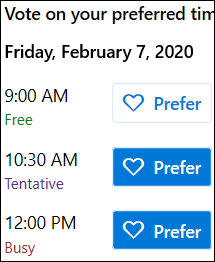
Availability: Under the time, it will show whether your availability status.
-
Hovering over it will show you more details of your status such as what events may be in conflict with that time.
-
Suggesting new meeting times
If the suggested meeting times are unsuitable, anyone you can suggest a new time. To suggest a time:
-
In the voting grid select Add a choice.
-
Fill in the fields.
-
Your suggested time displays in the voting grid.
Note: If the organizer of the poll has elected to Lock poll for attendees, then attendees will not be able to suggest new meeting times. The organizer of the poll will always be able to suggest new meeting times.
Changing attendee details
You can amend the details of any person you sent an invite to in the Attendees list:

-
Select
 to:
to:-
Edit their display name.
-
Change their status from required to optional or vice versa.
-
Delete an attendee.
-
-
Select + Add required attendeeor + Add option attendee to add an additional attendees. They will receive an email notification inviting them to vote.
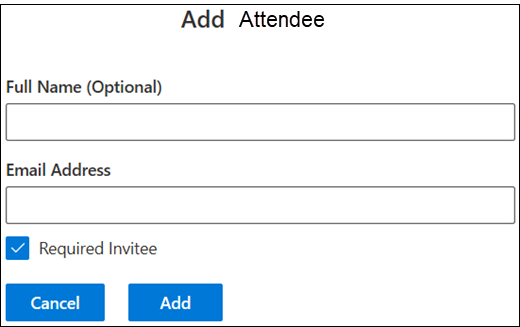
Note: If the organizer of the poll has elected to Lock poll for attendees, then attendees will not be able to add, edit, or delete any attendees, including themselves. The organizer of the poll will always be able to add, edit, or delete any attendees.
Cancelling polls
Only organizers can cancel invite polls. They can do it on on the voting page or in the organizer dashboard.
To cancel an invite on the voting page:
-
Select Cancel poll above the voting grid.

Scheduling meetings manually
The organizer can schedule the meeting manually at any time if auto scheduling is not enabled.
If auto scheduling is enabled, the organizer can also manually schedule the meeting before all attendees have voted or before auto scheduling is triggered. To learn more, see How FindTime auto scheduling works.
To manually schedule the meeting:
-
Select Schedule for a suitable time.
No comments:
Post a Comment