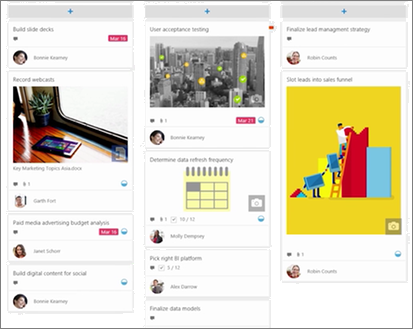
Microsoft Planner is a Microsoft 365 service that lets you create boards and add your team's tasks and assignments. On your Planner board you can sort your tasks into columns (or buckets). Buckets can indicate stages of development, days of the week, sprints, and more. You can move tasks around your board just by dragging and dropping them, so if you complete a task or just want to prioritize and shuffle things around, you can do that easily. Planner boards are helpful for communication, too, since they indicate where you and the rest of your team are with respect to completing tasks. Additionally, you can switch to charts view to display your team's progress. You can create a plan with all of these features right on your SharePoint site.

Notes:
-
Some functionality is introduced gradually to organizations that have opted in to the Targeted Release program. This means that you may not yet see this feature or it may look different than what is described in the help articles.
-
The Planner web part is available only on group-connected team sites.
Create a plan on your site
-
Go to the site where you want to add a plan.
-
Click New and then Plan at the top of the page.
-
If you want to create a new plan, enter a new plan name under Plan name in the pane on the right., and then click Create.
If you want to show an existing plan, click Use an existing plan and then select the plan you want to use in the box under Select an existing plan.
-
To show a link to the plan on the left side navigation, make sure Show in site navigation is selected.
To take advantage of all Microsoft Planner features, you can use the full Planner app. To do that, open Planner from the Microsoft 365 app launcher, or go to tasks.office.com and sign in with your work or school account. See Planner help for more information.
No comments:
Post a Comment