Every educator has their own approach for giving feedback. Because we know that engagement and learning often occur through an iterative process of drafting, incorporating feedback, and submitting revisions, Assignments is built around how real classrooms function. The turn in, review, and return process addresses learning scenarios like these:
-
Undo turn in A student decides to improve an assignment after they've turned it in before the due date.
-
Return and Turn in again A teacher returns student work before the due date and requests an addition or revision, allowing the student to turn in the assignment again.
-
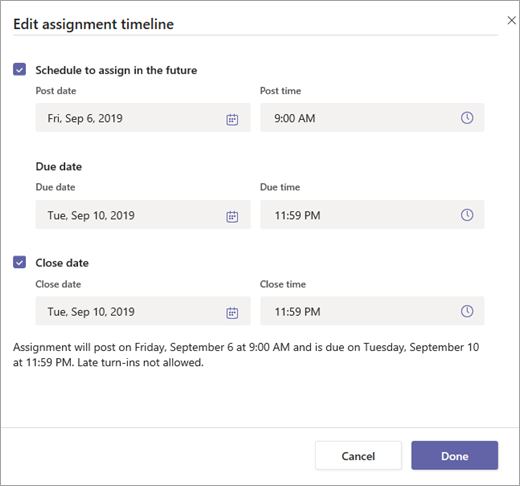
Assignment timeline Decide when assignments will post to students and whether you will accept turn-ins after the due date has passed.
-
Checkboxes Return work and assess scores on a rolling basis rather than all at once.
-
Viewed Track student engagement with assignments to see how many have been viewed.
-
Student view See how your assignment appears to students.
Review and return assignments
-
Navigate to the General channel in the desired classroom, then select Assignments.
Tip: Search for any assignment by keyword in the search bar.
-
Assignments with work left to grade are automatically sorted to the top of your list. Open one to start grading.
-
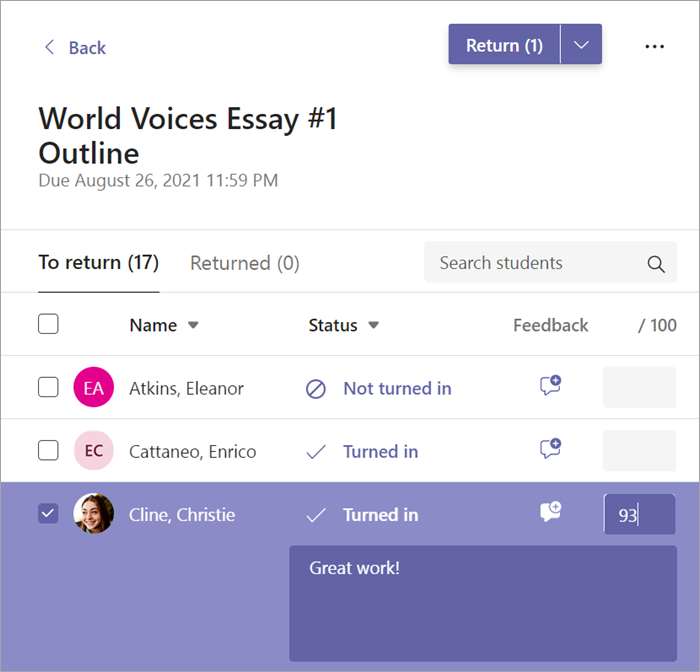
Assignments are sorted by To return and Returned.

| Name | Each student's name has a checkbox next to it so you can choose individual students to return work to. The checkbox at the very top selects every students' name. Select the arrow to sort students in ascending or descending alphabetical order. |
| Student work | Any documents you specified to be turned in are attached here. Select a student's status to view their work in full-screen mode. If the student's work is late and it's past the due date, you'll see a Late notification. Students who have not turned in work will show as Not turned in. You'll see Returned if you've already returned the assignment to that student. |
5. Select a box under Feedback to add comments for a student.
6. Add points if have designated points for this assignment. For example: 3.7/4.0 or 89/100.
7. Select the top checkbox to return work to all students or select the checkboxes next to individual student names.
8. Select Return. The students you selected will receive a notification that their assignment has been returned. Their name will now show up in the Returned column.
Update feedback and return again
When you've requested that students submit a revised assignment after you've returned it, revisit the assignment by opening it. You'll see an updated time and date stamp in the student's row. Repeat the steps above to update your feedback and return the assignment again.
Update how long you'll accept turn-ins at any time by selecting the assignment, then selecting Edit assignment. Select Edit and make your adjustments in the assignment timeline.

Tips:
-
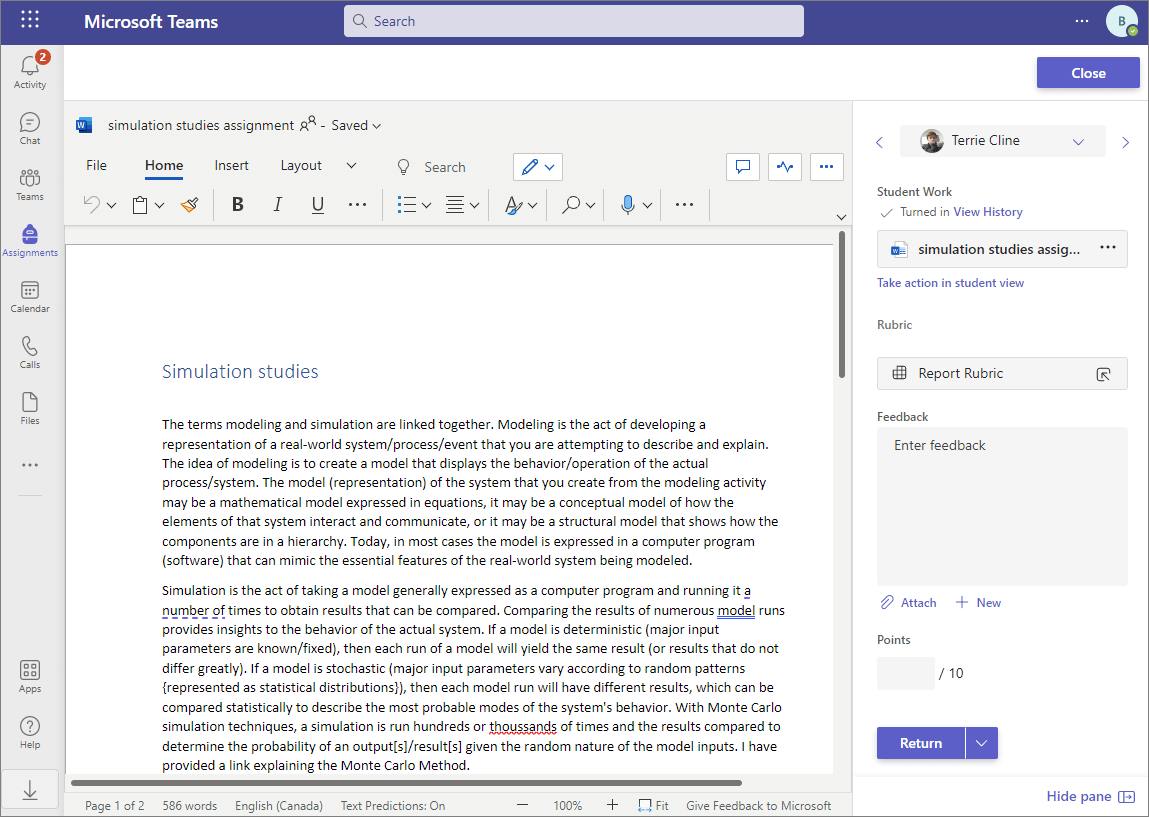
To review assignments in full-screen mode, select a student's status to open their work. Use the arrows to navigate from student to student. Feedback and points you enter will be saved automatically. While in full-screen mode, open and view documents students have turned in using OneNote for the web, Word for the web, PowerPoint for the web, or Excel for the web. Note that older files with .doc, .xls, and .ppt file extensions must be edited in the desktop version of those apps.
-

Turn in and revise work when you're a student
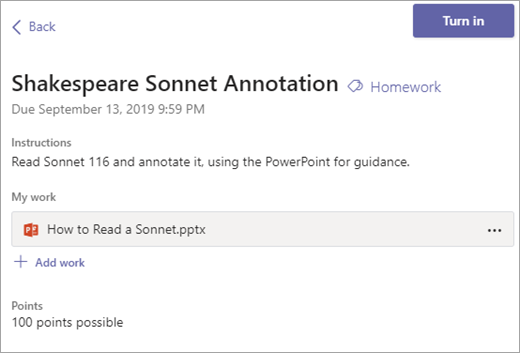
To turn in an assignment, select its assignment card. Depending on the status of your assignment, you may be turning your work in on time, late, or submitting revised work after it's been returned to you.
-
Navigate to the General channel in the desired classroom, then select Assignments. You can also use your search bar to search for an assignment by keyword.
-
Your assignments will show as cards organized by the date they are due. Select any assignment card to open it and view the assignment's details.
Tip: Select the Expansion icon (diagonal, double sided arrow) to work in full-screen mode.
-
If your teacher specified a document for you to turn in or you have other files to attach to this assignment, select +Add work and upload your file. It's possible to work on Office files right from this screen--no need to leave the app.
-
If you're turning in the assignment for the first time before the due date, select Turn in. You'll see a time and date stamp recording your turn-in.

Here are other options for turning in your work:
| Undo turn in | Take back an assignment you've already turned in to make changes before the due date. |
| Turn in again | Turn in work after making revisions to an assignment you've already turned in. For example: Your teacher has returned it to you and asked for changes, or you've decided to revise your work before the due date. |
| Turn in late | Turn in work after the due date for the assignment has passed. This means your teacher is accepting late turn-ins. You might be turning in the assignment for the first time or submitting a revision after it's been returned to you. |
| Not turned in | Your teacher is no longer accepting turn-ins for the assignment and you won't be able to turn in work. |
Are you looking for ,Assessment Development Services assessment development services? Acadecraft is the primary option for you! We have SMEs with in-depth knowledge of various disciplines, ensuring 100% accuracy. The best quality analysts and editors back our assessment services. We ensure 24x7 services at cost-effective rates. To know more about our services, connect with us.
ReplyDelete