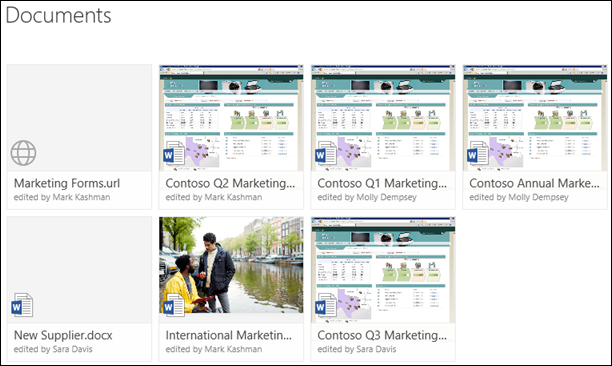
When you're using SharePoint in Microsoft 365 or SharePoint Server 2019, you can add a link in a document library to an item that is located outside the document library. For example, you can add a link to a file or folder located in a different document library, site, or even an external website. When you add a link in a document library, the link shows up in the list of items in that library.
Notes:
-
This feature isn't available in classic SharePoint experience or SharePoint 2016 server or earlier.
-
To find the version of SharePoint that you're using, see Which version of SharePoint am I using?

To add a link in a document library
-
Go to the document library where you want to add a link.
-
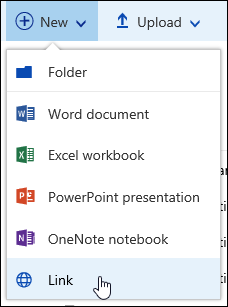
In the top left menu, select New, and then select Link.

-
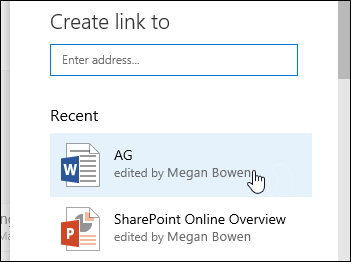
In the Create link to dialog, enter the link.
For example, if you want to add a link to a file that is located in another library, first navigate to that library. Right-click the file that you want to link to, and select Get a link. Choose the type of link you want, and then copy the link. Return to the document library where you want to add the link, and enter that link in the Create link to dialog.
For more info about how to get a link to a file in Microsoft 365, see Share files or folders in Microsoft 365.
-
After you enter the link in the Create link to dialog, the File name field appears. In the File name field, enter a name for the link, and then select Create.
Note: When you create a link, ".url" will automatically be added to the end of the filename.
-
Alternately, you can select New > Link, and then select an item from the Recent list. A link is added to the document library automatically without the need to enter the address or filename.

See Also
Video: Create, upload, and share files in a document library
No comments:
Post a Comment