You've upgraded to a new version of Excel, and realize you'll be sharing workbooks with people who haven't upgraded yet. Running the Compatibility Checker can help you identify features or information that might not be available in an earlier version, so you can resolve some of those issues before you share your workbook.
Save a file to .xls format and review Compatibility Checker issues
Follow these steps:
-
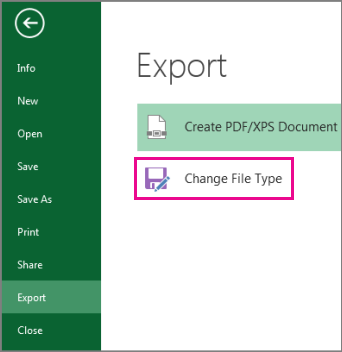
Click File > Export > Change File Type.

-

-
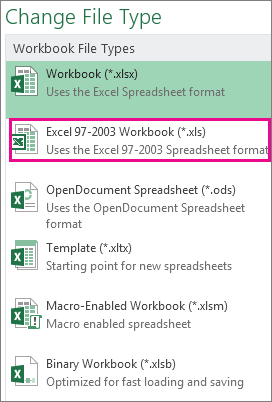
Under Workbook File Types, double-click Excel 97-2003 Workbook (*.xls).

-
In the Save As popup window, choose a folder location for the workbook.
-
In the File name box, type a new file name (or use the one that's already there).
-
Click Save.
-
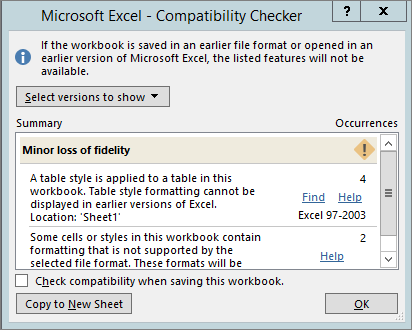
If the Compatibility Checker appears, review any compatibility issues that were found.

The Find link takes you to that place in your worksheet, and the Help link takes you to information on the issue and possible solutions.
Notes:
-
In your new version of Excel, the workbook you just saved in .xls format opens in Compatibility Mode. Keep working in this mode when you plan to send this workbook back and forth to people who open it in the earlier version of Excel.
-
When you no longer need backward compatibility, click File > Info > Convert to convert the workbook to the current file format so you can take advantage of What's new in Excel.
Run the Compatibility Checker for Excel 2007 and later
To verify that a workbook is compatible with Excel 2013, 2010, or 2007, run the Compatibility Checker manually the first time you save your workbook. Then set the Compatibility Checker to run automatically every time you save that workbook.
Follow these steps:
-
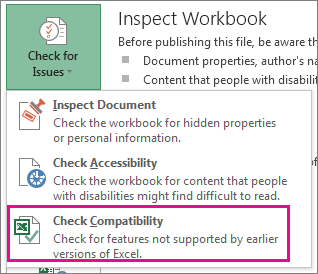
Click File > Info > Check for Issues.

-
Choose Check Compatibility.
-
To check for compatibility automatically from now on, check the Check compatibility when saving this workbook box.
Tip: You can also specify the versions of Excel that you want to include when you check for compatibility. All versions are checked by default, so just uncheck the versions you don't want to include.

If any issues are found, the Find link takes you to that place in your worksheet, and the Help link takes you to information on the issue and possible solutions.
Use Access to combine data sources for Data Features that use multiple tables
Note: You can also use the VLOOKUP function in Excel to address this issue, but the process is somewhat complicated, and becomes more complicated as the number of data sources to combine increases.
Excel 2010 and earlier versions don't support data features that analyze multiple tables, because those Excel versions don't have a Data Model. If your workbook contains any such features, you may be able to prepare them for use in earlier versions by combining the feature's data sources into a single table and then using that new table as the data source.
One way to do this is to use Access to combine the data sources and reproduce them as a query, which you can then import into your workbook. The process goes like this:
-
In Access, import each original data source as a new table.
-
In Excel, open the Relationships dialog box by clicking Data > Data Tools > Relationships and note the relationships between the original data sources.
-
In Access, recreate each of the relationships.
-
In Access, create a query that contains all the fields your Excel data feature needs.
-
In Excel, import the query into a new worksheet as a table.
Once your data is in one table in Excel, choose that table as the data source for the data features that were using multiple tables, or recreate the data features and choose the new table as their data source.
Need more help?
You can always ask an expert in the Excel Tech Community, get support in the Answers community, or suggest a new feature or improvement on Excel User Voice.
See Also
Excel formatting and features that are not transferred to other file formats
No comments:
Post a Comment