Make the whole picture transparent
If you're using a Microsoft 365 subscription, you can apply transparency directly to a picture. For more info, see Change the opacity of a picture in Microsoft 365.
-
Draw a shape first
-
Fill it with a picture
-
Adjust the picture's transparency

For other versions of Word, use this workaround.
-
Select Insert > Shapes and choose a shape.
-
Draw the shape in your document, making it the same proportions as the picture you're about to add to it.
-
Right-click the shape and select Outline > No Outline.
-
Right-click the shape again, and then select Format Shape.
-
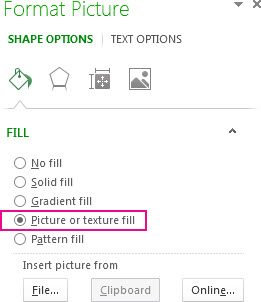
In the Format Shape pane, select the Fill icon
 , and then select Picture or texture fill.
-
Select File, choose a picture, and then select the Insert button.
-
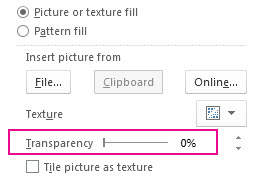
Move the Transparency slider in the Format Shape pane to adjust the picture.

Or you may enter a number in the box next to the slider: 0 is fully opaque, the default setting; and 100% is fully transparent.
If your picture is distorted, you can make adjustments to the appearance by resizing your shape or by using the Offset settings below the transparency slider.
Make part of a picture transparent
You can make one color in a picture transparent by using the built-in transparency feature. Unlike making an entire picture transparent, making one color transparent is possible only in an object that's inserted as a picture, not inside a shape.
Important: Areas that seem to be a single color (for example, green leaves) might actually be made up of a range of subtle color variations, and you might not get the effect you want. Setting a transparent color works best with simple, solid-color pictures, such as clip art.
-
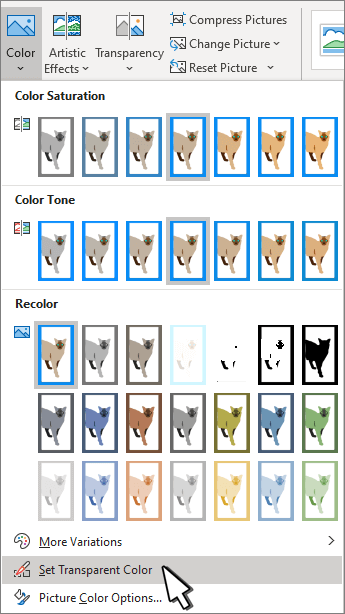
Select the picture, and go to Picture Format > Color or Picture Tools > Format > Color.
-
Select Set Transparent Color.

-
When the pointer changes, select the color you want to make transparent.
To undo color changes, select Reset Picture in the Adjust group.
Note: When you print pictures with transparent areas, the transparent areas are the same color as the paper. On your screen or a website, the transparent areas are the same color as the background.
Change the transparency of a picture or fill color
If you're using a Microsoft 365 subscription, you can apply transparency directly to a picture. For more info, see Change the opacity of a picture in Microsoft 365.
For other versions of Word, use this workaround.
-
Go to Insert > Shapes and choose a shape to use.
-
Select Shape Format > Shape Fill.
-
Select Picture and choose the picture that you want.
-
Select Insert.
-
Select the shape, and go to Shape Format to open the Format Pane.
-
Select Fill > Picture or gradient fill and then drag the Transparency slider to set the exact percentage of transparency you want.

Make one color of a picture transparent
You can make one color in a picture transparent to hide part of the picture or create a layered effect. Transparent areas in pictures show through the color of the paper or background.
-
Go to Insert > Picture and add a picture to your document
-
Select the picture for which you want to change the transparency of a color.
-
On the Picture Format tab, select Color or Recolor, and then select Set Transparent Color.
-
Click or tap the color in the picture or image that you want to make transparent.
Note: You can't make more than one color in a picture transparent. Areas that appear to be a single color might actually be made up of a range of subtle color variations. The color that you select might appear in only a small area, and it might be difficult to see the transparent effect in certain pictures.
You can't make a picture transparent in Word for the web. You have to use a desktop version of Word (on either Windows or macOS) instead.
No comments:
Post a Comment