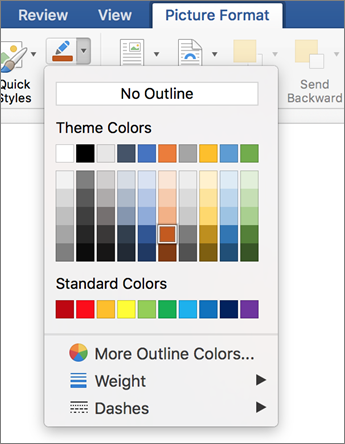
Here's how to add a line, pattern, or custom border to a text box, picture, and other objects in Word, PowerPoint, or Excel for Mac.
Note: If you didn't add the border to the shape, text box, picture, or other object in Mac Office, you can't change or remove the border for the object.
Try the "Sketched" outline
| |
If you're using Microsoft 365 for Mac (version 16.28 or later), you can give a casual, hand-drawn look to shapes with the Sketched outline.
-
Select an existing shape in your document, or draw a new one.
-
With the shape selected, on the Shape Format tab, select Shape Outline > Sketched, and then select a line width. (The smaller the point size ("pt"), the thinner the line is.)
Add or remove a border for a shape or text box
-
Select the shape or text box to which you want to add, change, or remove a border.
-
Click Shape Format, and then click the arrow next to Shape Outline.

-
Do any of the following:
To
Do This
Add or change the color of the border
Either click the color that you want, or mix your own color by clicking More Outline Colors.
Add or change the thickness of the border
Point to Weight, and then choose the line weight that you want.
Add or change the style of the border
Point to Dashes, and then click the line style that you want.
Remove the border from the shape or text box
Click No Outline.
Add or remove a picture border
-
Select the picture to which you want to add, change, or remove a border.
-
Click Picture Format, and then click the arrow next to Picture Border.

-
Do any of the following:
To
Do This
Add or change the color of the border
Either click the color you want, or mix your own color by clicking More Outline Colors.
Add or change the thickness of the border
Point to Weight, and then choose the line weight you want.
Add or change the style of the border
Point to Dashes, and then click the line style you want.
Remove the border from the picture
Click No Outline.
 This feature is available only to
No comments:
Post a Comment