Delete files in a library
When you no longer need documents, pictures, files, or folders in a library, you can quickly delete them. Be careful that no one else needs them either, and that the files are all checked in. Deleting files may be permanent and you may be unable to recover them. If you think that you might need the files later, consider moving the files to another location instead. If you delete files by mistake, see Restore items from your Recycle Bins below. You may be able to restore your files to the library depending on how your site was set up.
Notes:
-
If a file has an arrow overlaid on the icon, it is being shared. If you haven't checked it out, hover over the icon to see who has it checked out, and ask for it to be checked in before deleting. See Check out, check in, or discard changes to files in a library for more info.
-

Delete files and folders from a document library
-
Make sure the files that you want to delete are not checked out by refreshing the browser and noting the icon in the Type column. Files must be checked back in by the person who checked them out before you can delete them.
-
Select each file that you want to delete by hovering over the file and then clicking the checkmark.
-
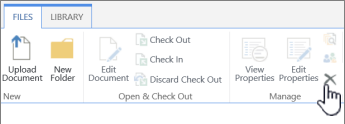
In the header, click Files > Delete Document.

-
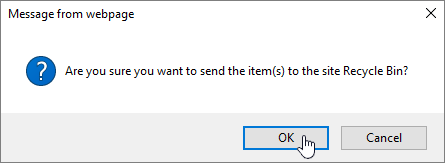
In the Delete confirmation dialog box, click OK.

An alternate way to delete files and folders
Depending on the version of SharePoint you're using, it may be quicker to delete single or multiple files using the right click menu.
-
Open the document library where you want to delete files or folders.
-
Select one or more files that you want to delete by hovering over the file and then clicking the check box. In SharePoint 2016 you can select files and folders together, but in SharePoint 2013 you need to select them separately. If you're deleting just one file or folder, you can skip this step.
-
Right click on the icon of one of the files. In SharePoint 2016, click Delete. For SharePoint 2013, click the ellipses (...), and then click Delete.
-
In the Delete confirmation dialog box, click OK.

Restore items from your Recycle Bins
-
Click Recycle Bin in the Quick Launch bar on the left of the screen.

If you don't see the Recycle Bin on the Quick Launch bar, follow these steps:
-
Click Settings
 , and then click Site Content.
 -
The Recycle Bin is in the top right portion of the Site Content page.

-
-
In the Recycle Bin page, click the box to the right of the items or files you want to delete or restore.
-
Click Restore Selection to recover the selected files.
Note: If you don't see the item you're looking for, it may have exceeded the holding time limit and already deleted. But all is not lost. You can contact your administrator who may be able to restore it.
When an item is restored, it is restored to the same location that it was deleted from.

No comments:
Post a Comment