Animate text and objects with motion paths in PowerPoint 2016 for Mac
You can add visual interest and emphasis to your presentation by animating a graphic or block of text so it that follows a set path on the slide. To do this, select the object you want and go to Animation > Path Animation.
Choose a predefined path and modify it to fit your needs or draw your own custom path animation:
Using predefined paths
Using custom paths
Using predefined paths
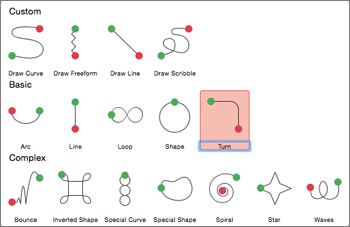
In most cases, using one of the basic path animations is a perfect choice for adding interest to your slide. In the following example, we'll apply a Turn path animation to a graphic, use Effect Options to change the direction of the path, and then use Reverse Path Direction to get the final look we want.
Example: applying a predefined path animation to a graphic
-
On a blank slide, click Shapes > Rectangle (or another shape if you prefer), and then click in the upper-left corner of the slide to insert it.
-
With the rectangle still selected, click Animations > Path Animation, and then under Basic, click Turn.

-
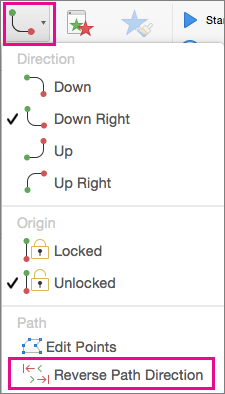
Wait until the animation preview is finished and click Effect Options > Down Right.
-
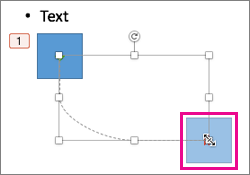
Move your cursor over the animation end-point until it changes to a double arrow with a line through it, and then click and drag to the lower-right corner of the slide.

-
Finally, click Effect Options > Reverse Path Direction.

The animation now moves the graphic from the least visible place on the slide (lower right) to the most visible (upper left).
Using custom paths
To draw a custom path animation, select the object you want to animate and click Animations > Path Animations. The drawing method is different depending on the type of path you choose.
To draw a Curve or Freeform path: 
-
Click the start point, and then click each time you want to begin a change of direction.
-
Double-click to finish.
To draw a Line or Scribble path: 
-
Click and hold the mouse button to trace the shape you want, and then release the button when you're done.
To change a custom path once you've drawn it:
-
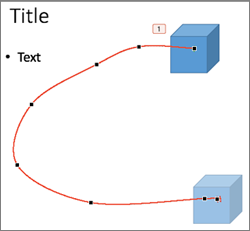
Control+click or right-click the custom path and click Edit Points.

Tip: If you've never worked with editing paths in a graphics program before you may find it easier to delete the effect and draw it again.
No comments:
Post a Comment