Cards in Power View
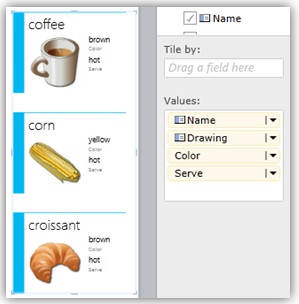
You can convert a table to a series of cards that display the data from each row in the table laid out in a card format, like an index card.

-
Create a table with the fields you want in the cards.
Tip: You can use images in your data in cards. Read more about using images in Power View.
-
Convert it to a card.
-
In Power View in Excel, click Design > Table > Card.
-
In Power View in SharePoint on the Design tab in the Visualizations gallery, click the arrow to show all the visualizations, and then click Card.
-
-
On the Design tab, choose between regular Card style and Callout style.
The Card style displays the default label more prominently. In the Callout style, all the text is large.
Cards display the default image in a prominent location, with the default label field in the banner of the card.

The data model author can set properties either in Power Pivot or SQL Server Data Tools to change how fields are displayed in cards. If you're working in Power View in Excel, you can enable Power Pivot and configure table behavior properties for Power View reports yourself in the Power Pivot window.
-
Setting the Default Label property on a field in the model makes it the heading for cards. For example, for a Contacts table, the default heading would probably be each person's name.
-
Setting the Default Image property on an image field in the model makes Power View display the image more prominently.
See Also
Charts and other visualizations in Power View
Power View: Explore, visualize, and present your data
No comments:
Post a Comment